GypsyTinker
Well-known member
Hey all,
I'm cheap Luckily, I am also fairly handy. So if I need something, I'm more likely to make it than buy it.
Sometimes this actually works out. Sometimes, it's just me tinkering on so long that I should have just bought what ever it is...
This time, it's definitely a quick and easy solution and I didn't really have to buy anything or take much time to build...
I first saw a feeder like this here: diy-tin-can-feeder-t10388.html and it is part of why I joined this forum! Thank you Ollitos!
I used smaller cans for individual cages and added to the design for smoother feed flow as well as using them for waterers.
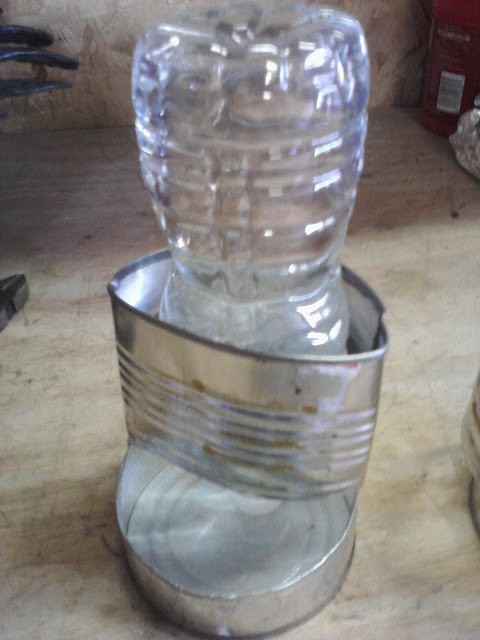
Here they are, feeders and waterers out of soup cans and water bottles.
These soup cans (tomato cans actually) are 4" wide. Perfect to fit between the 2"x4" fencing I use.
First, cut the can like so...and spread it open a bit.
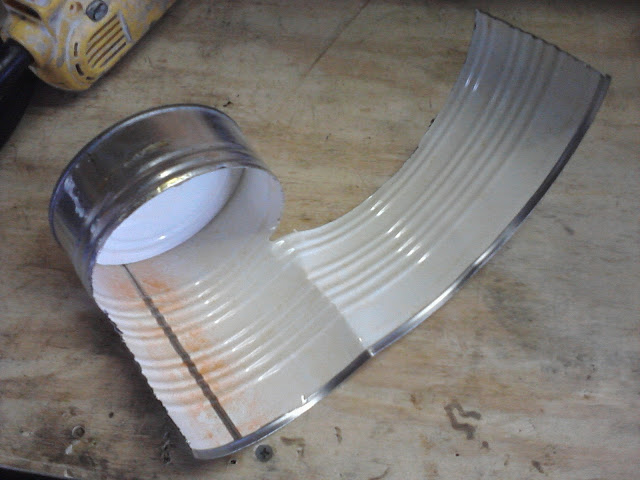
Then use pliers to start rolling all of the exposed sharp edges.
This does NOT have to be pretty or perfect.
Be sure to roll the bottom edge OUT rather than in. (It is wrong in the picture)
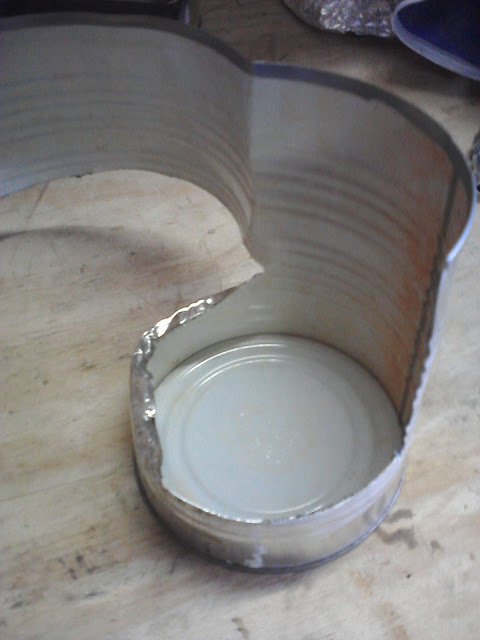
Continue with the pliers and get all 3 exposed edges partially rolled.
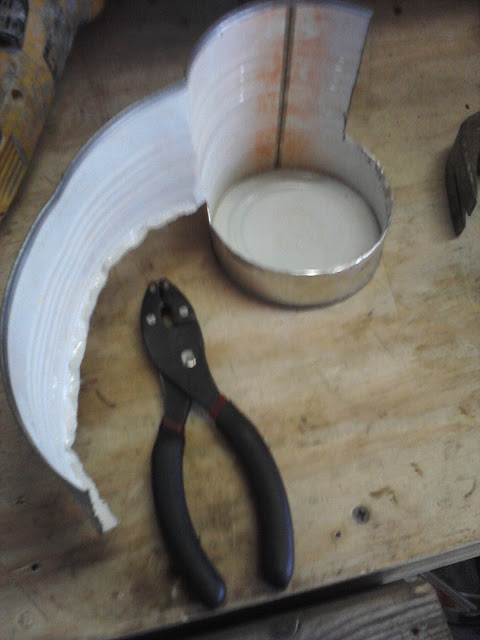
Then use a hammer to flatten the roll nicely.
Be sure to hammer the top edge too, as it can sometimes be sharp
from when the can was opened and this may cut your water bottle.
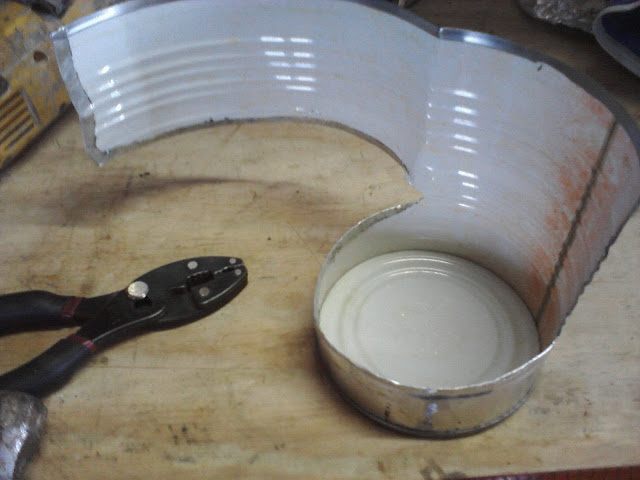
Next, you just fold this big flap across the can and wrap it loosely around.
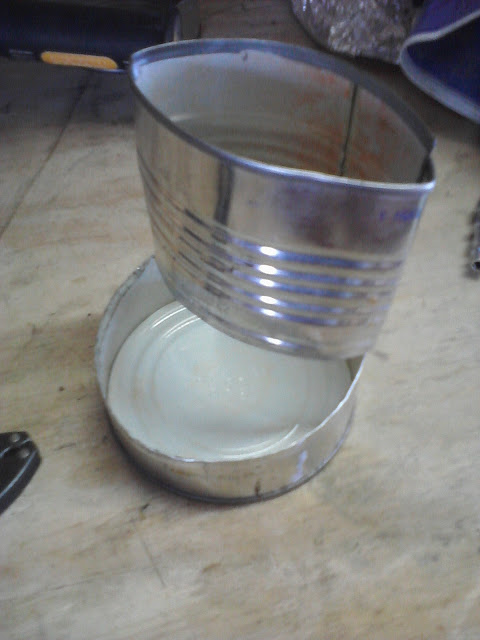
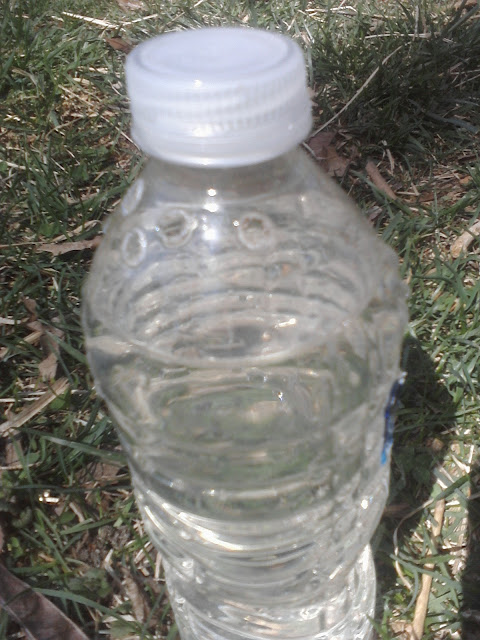
I used a soldering iron to put some holes in the water bottle,
near the mouth of it and one a little further down (up) the bottle
to set the water level and allow air to bubble in. Keep the cap!
And...VOILA!
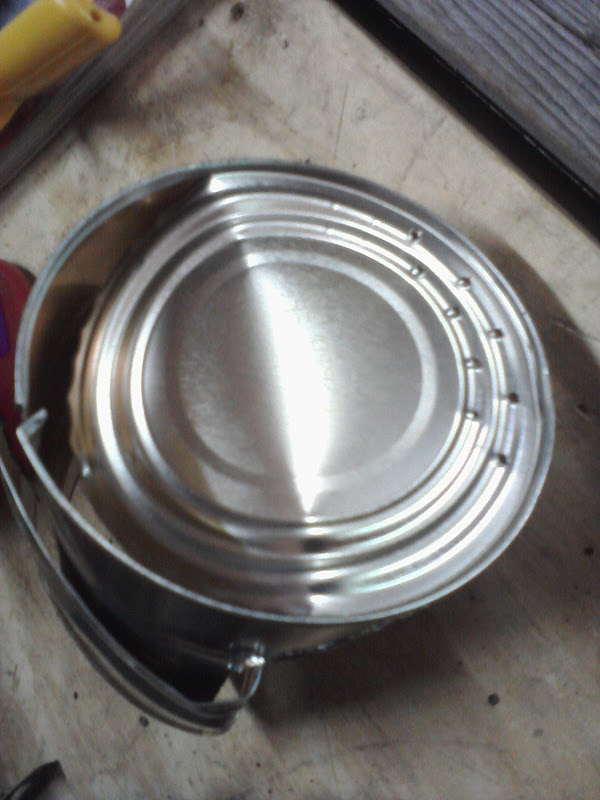
To use as a feeder, I put about 6 drain holes in the bottom front and I use a can opener on the back side of the bottom and lift it up to make a slope for the food to move forward. Then I cut a slit in the back and fold the edges under the sloped part for support. This allows the food to slide forward to the rabbit and any water to drain through.
Here they are in use!
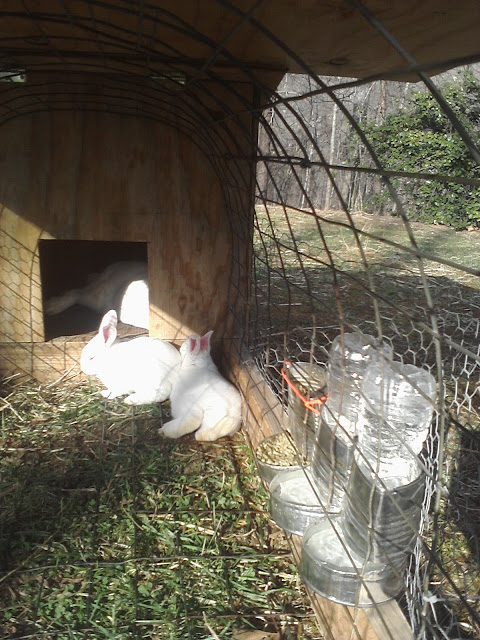
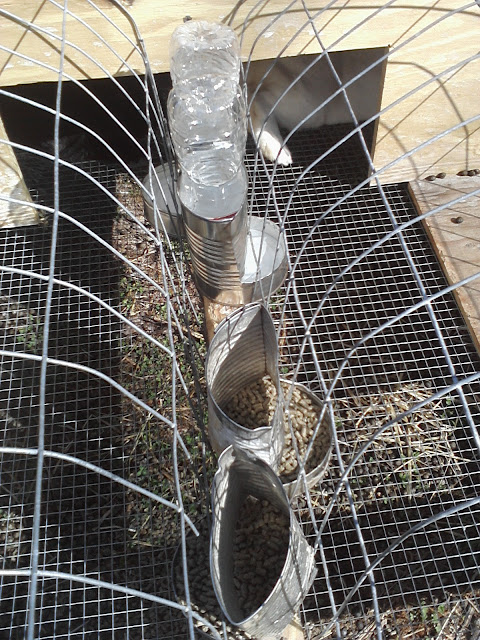
They may not last forever, but I made 6 very quickly. For the waterers, I used coated cans. Next time I will roll the bottom lip outwards to prevent rusting. We'll see how they hold up.
My rabbits sure put them to the test on this 88 degree day today
Let me know what you think!
I'm cheap
Sometimes this actually works out. Sometimes, it's just me tinkering on so long that I should have just bought what ever it is...
This time, it's definitely a quick and easy solution and I didn't really have to buy anything or take much time to build...
I first saw a feeder like this here: diy-tin-can-feeder-t10388.html and it is part of why I joined this forum! Thank you Ollitos!
I used smaller cans for individual cages and added to the design for smoother feed flow as well as using them for waterers.
Here they are, feeders and waterers out of soup cans and water bottles.
These soup cans (tomato cans actually) are 4" wide. Perfect to fit between the 2"x4" fencing I use.
First, cut the can like so...and spread it open a bit.

Then use pliers to start rolling all of the exposed sharp edges.
This does NOT have to be pretty or perfect.
Be sure to roll the bottom edge OUT rather than in. (It is wrong in the picture)

Continue with the pliers and get all 3 exposed edges partially rolled.

Then use a hammer to flatten the roll nicely.
Be sure to hammer the top edge too, as it can sometimes be sharp
from when the can was opened and this may cut your water bottle.

Next, you just fold this big flap across the can and wrap it loosely around.

I used a soldering iron to put some holes in the water bottle,
near the mouth of it and one a little further down (up) the bottle
to set the water level and allow air to bubble in. Keep the cap!

And...VOILA!

To use as a feeder, I put about 6 drain holes in the bottom front and I use a can opener on the back side of the bottom and lift it up to make a slope for the food to move forward. Then I cut a slit in the back and fold the edges under the sloped part for support. This allows the food to slide forward to the rabbit and any water to drain through.

Here they are in use!


They may not last forever, but I made 6 very quickly. For the waterers, I used coated cans. Next time I will roll the bottom lip outwards to prevent rusting. We'll see how they hold up.
My rabbits sure put them to the test on this 88 degree day today
Let me know what you think!


