New Hutch

Rabbit Talk  Forum

Help Support Rabbit Talk Forum:

This site may earn a commission from merchant affiliate links, including eBay, Amazon, and others.

michaelhodgejr

Well-known member
Joined
Jun 7, 2012
Messages
56
Reaction score
0
Location
Indiana
Me and my girlfriend decided to move in together, and I got to bring the rabbits! :D I'm very excited for the move as the rabbits are no longer stuck inside a 7x9 balcony. Of course, not being 3+ hours from the girlfriend helps as well.

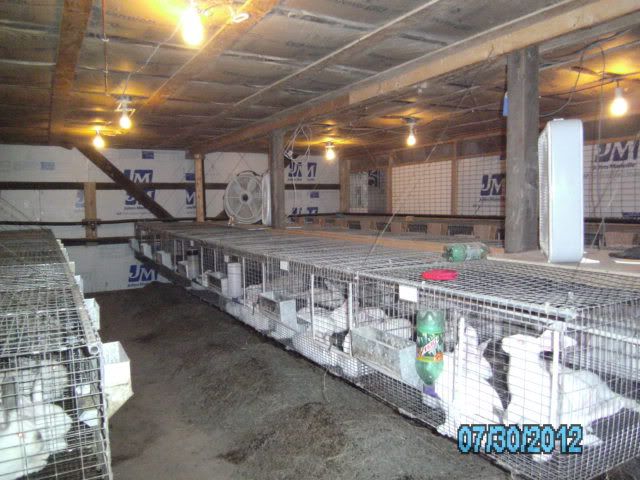
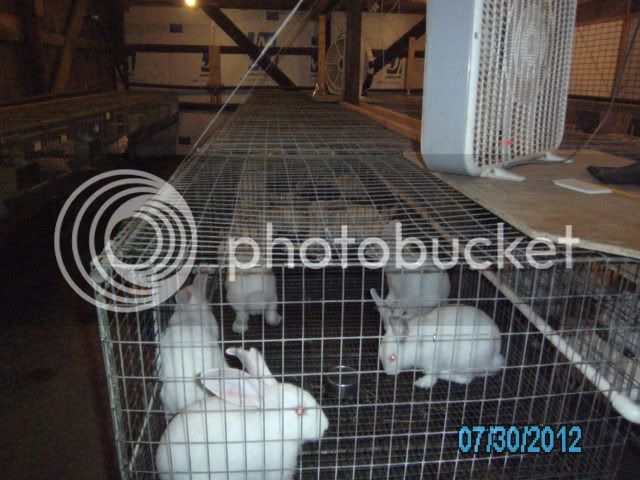
I posted some pictures below. It took us a few weeks to get everything built, but I think the rabbits are going to be happy. I'm hoping the fencing panels will be enough to keep out most of the winter winds, and it's already survived a few bad rain storms. The only thing we have left to finish is adding some panels to the open area at the top to prevent additional winds/snow from getting in.

The structure measures 16ft x 8ft. It's big enough that I am able to expand my herd some. The left side contains four 30x36 doe/nursery cages and a 24x24 cage for one of the bucks. The right side contains two 48x24 cages (that i made by combining two 24x24s) for growout cages and another 24x24 buck cage. I have some left over room to add either another growout cage, or two 24 cages. I'm excited to ramp up production!

Next step is to add the automatic watering system!
 

Attachments

  • rabbit_hutch_outside.jpg
    rabbit_hutch_outside.jpg
    860.7 KB · Views: 1,508
  • rabbit_hutch_inside.jpg
    rabbit_hutch_inside.jpg
    619 KB · Views: 1,508
Wow, Michael!

The new bunny area looks wonderful! So much more room than you had on your balcony. :)

Might I suggest installing some "BunnyBuckets" to provide shelter from windblown precipitation? And perhaps some litter jugs for the baby bunnehs?

IMG_5773.JPG

Here is the link to my post about making BunnyBuckets:

how-to-pot-up-a-rabbit-t6566.html
 
Very nice. I truly think your rabbits will be happy. And your girlfriend too now that you aren't that far away any more.

Wishing you all the success.

BTW, any pics of the rabbits?

Karen
 
MamaSheepdog":sf7o956x said:
Wow, Michael!

The new bunny area looks wonderful! So much more room than you had on your balcony. :)

Might I suggest installing some "BunnyBuckets" to provide shelter from windblown precipitation? And perhaps some litter jugs for the baby bunnehs?


Here is the link to my post about making BunnyBuckets:

how-to-pot-up-a-rabbit-t6566.html

I have been toying with the idea of the bunny buckets since i saw your post about it a while back. Would they fit in a 24x24 or would they take up too much room?
 
My buck cages are 24" x 24" x 18" high, and they fit. My doors swing in and up, and the angle of the bucket allows just enough clearance for them to open.

My BunnyBarn is between two sheds, and is open on the ends. We have removable panels for the ends of the barn that we put up during the winter months when ventilation isn't such an issue, but the aisles are still open. The buckets keep the rabbits mostly dry when there is windblown rain or snow. Their faces get damp, but not their bodies. They love them at all times of the year though! :)

I do take them out when a doe is due to kindle so she has more freedom of movement while building her nest, and also to prevent her from trying to use it instead of her nestbox. Once she has her babies she gets her bucket back.
 
Michael,
Nice set up:::::Here's a few suggestions to make it easier for you and more efficient for your rabbits and the watering system you're thinking about.

I can see spaces between each pen....Get some industrial-strength Zip-ties and join all of your cages together with them. If you want a solid wall between some of them, get some roof flashing from your local hardware store and place it between the cages. Securely fasten it, leaving a couple of inches open at the bottom of the cage.

Remove the 2X4 the cages are resting on and use it as a "hanger" for the backs of the cages. I use a 16 penny finish nail every so often to place the top edge of the back of the cage on to hang it suspended.

Get some 1/2" electrical conduit in ten foot lengths and run it through the top-front edge of your row of cages. (See Photo) Once again, use those Zip-ties to secure it in place. Once you've done that, carefully hang your cages on the 2X4 nailer and "Prop" them up level with a temporary block under the front edge of the cages. Next, get some 16 gauge contractor's wire and go from nails you put in the ceiling to the cage and secure it around the conduit, where it will hang suspended with nothing under the cages so you can easily clean out from under them.

With the cages secured together with the Zip-Ties and the conduit holding the weight on the front of the cage, they will never sag on you. All of the "prop-legs" under the cages can be removed and you've got a free-shot at all of the doo-doo without having to work around any obstructions under the cages.

With your caging system together in this fashion, an auto-watering system is easily installed and will save you dozens of hours changing dirty water bowls or bottles. Plus, the water is always fresh, clean, and easy!! In my opinion, an automatic watering system is the wisest investment any rabbit raiser can make. You will be amazed at the amounts of time you will save.

OOPS::I forgot a VERY, VERY, important item!! If you're planning on using a rigid water system with schedule#40 1/2" PVC, make sure you cut the wire out on the back of the cage-side, giving you a 2"X2" opening to fit your water line through BEFORE you Zip-tie the cages together. I have all of my water lines 8" above the floor for my meat rabbits. If you raise smaller breeds, you may want to have yours 6" off the floor. Do the same with your solid dividers with a pair of sheet metal shears. Don't worry about the rabbits chewing on the pipe. They can't/won't do so.

It sounds like a lot of work but in the end you'll be well-satisfied with the outcome. Good luck.

Grumpy.
SANY0043-1.jpg


This side view of my cages gives you a pretty good idea of what I'm talking about. You can see where the wire was cut to allow the water pipe through and it gives you a close view of the conduit on the front.
SANY0045.jpg

The extra water bottles on these cages are auxiliary sources of water.<br /><br />__________ Fri Sep 28, 2012 6:37 am __________<br /><br />Michael,
One added note: If and when you put a rabbitry together in this fashion, you want to make sure it's what you want because it's more or less permanent. All cages and watering system are linked together and it's a little difficult to make changes once it's all together. Changes can be made...but not so easily as when they are all independent of one another.
Grumpy.
 
Grumpy is right on...the wood the cages are sitting on will shortly be soaked in urine and pee and will attract flies and be really smelly. much better to hang the cages. We also used electrical conduit and plastic coated wire to hang the cages in our new barn.
 
Grumpy, I am just learning about different wire types, what type of wire are you using? How do you attach the wire to the cages and overhead support? Does it ever slip, that it needs to be checked, and how often should the checks be made?
 
Thanks Grumpy (et all)!

When building the hutch I debated about going with hanging cages versus sitting them on the table like they are now. I opted to go with the sitting cages as we had the supplies for it and at that point in the build, i just wanted to get the thing built.

Though now seeing the rabbits pee all over everything, I am going to go to hanging cages at some point in the future. It's not a huge priority at this point, but maybe after the watering system I will transition to a hanging cage system.
 

Latest posts

Back
Top