grumpy
Well-known member
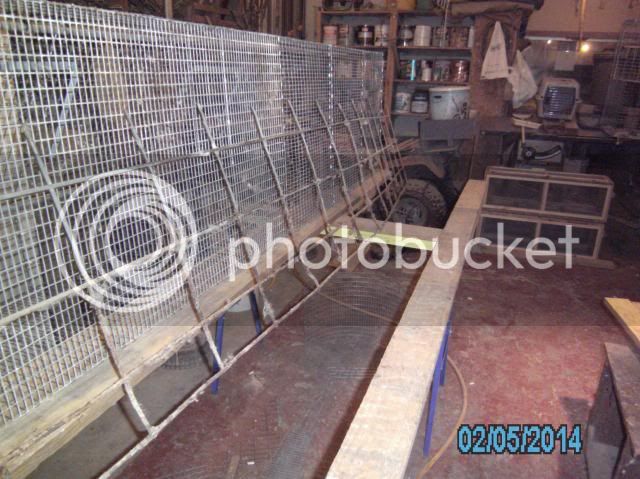
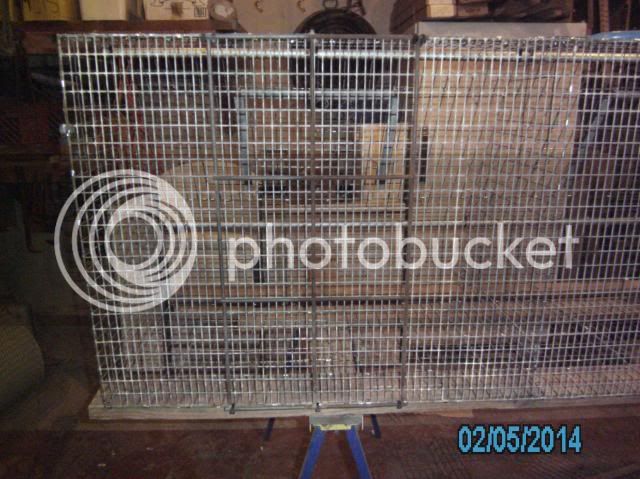
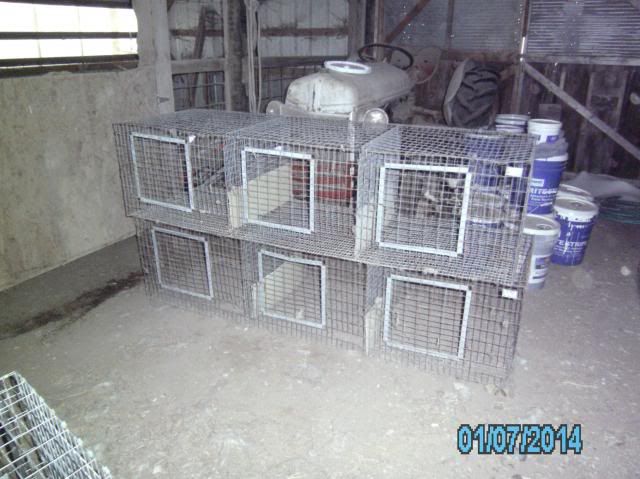
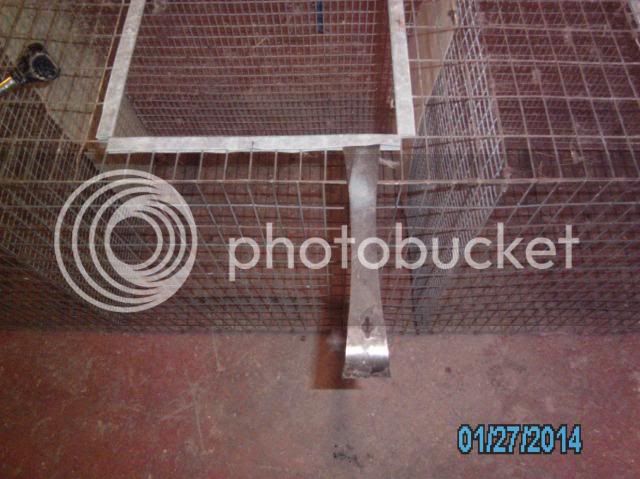
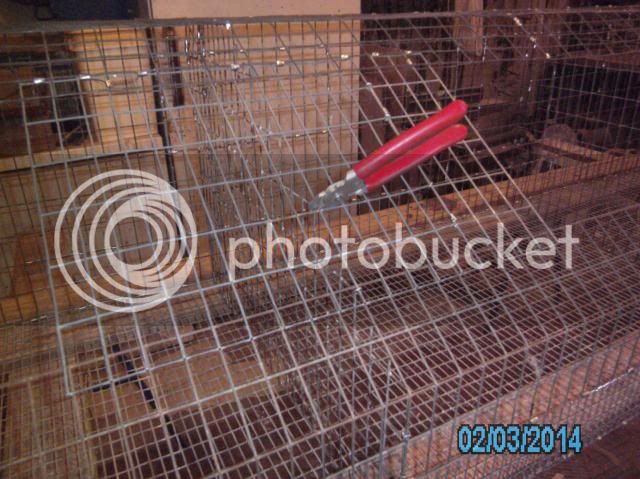
These are average, run of the mill, used cages I find from time to time.
Years of abuse/neglect, leave them in less than good condition.
The one redeeming feature about these is the fact that the floor wire
is 14 gauge, galvanized AFTER welding. This wire lasts forever. If I'd
taken my time and did a little "negotiating", I could have gotten them
for a few bucks a hole cheaper.
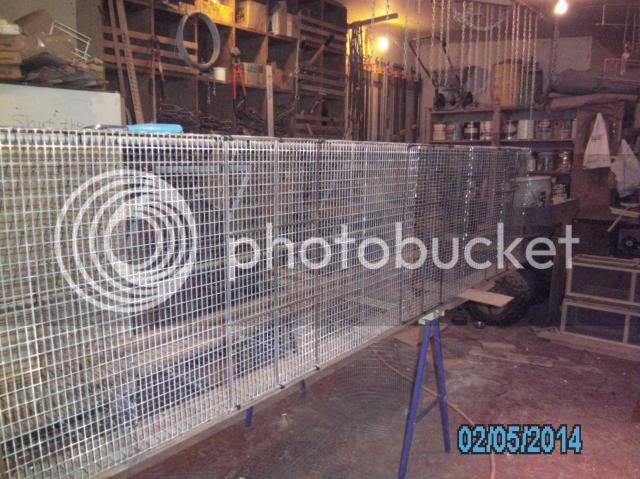
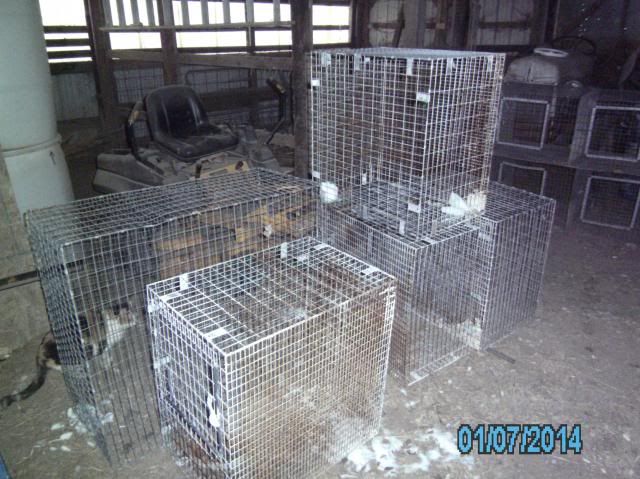
I also keep my eyes open for larger single units. These take a beating,
but the bigger dimensions give me the opportunity to use longer spans
in some parts of my cage re-purposing. I spend a lot of time straightening
all of the bends and "crunches" out of them once they're apart.
Being single cages, they afford me one extra side panel per unit.
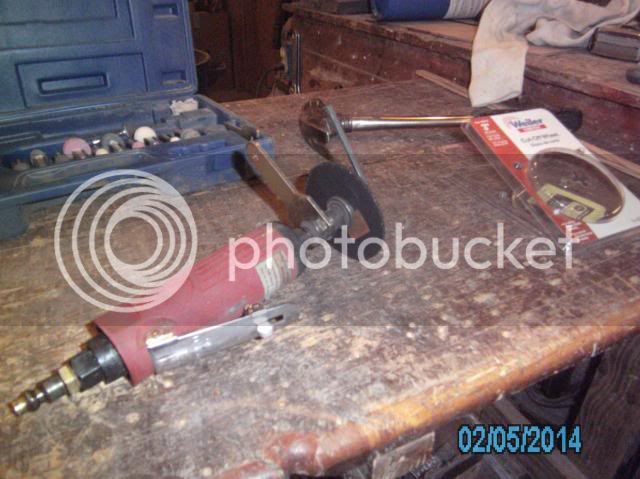
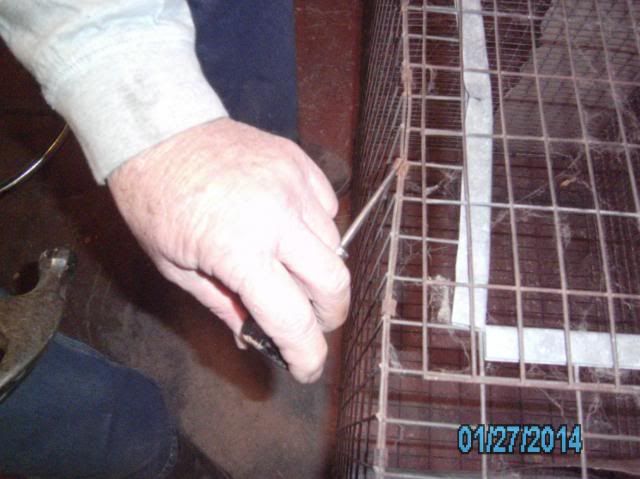
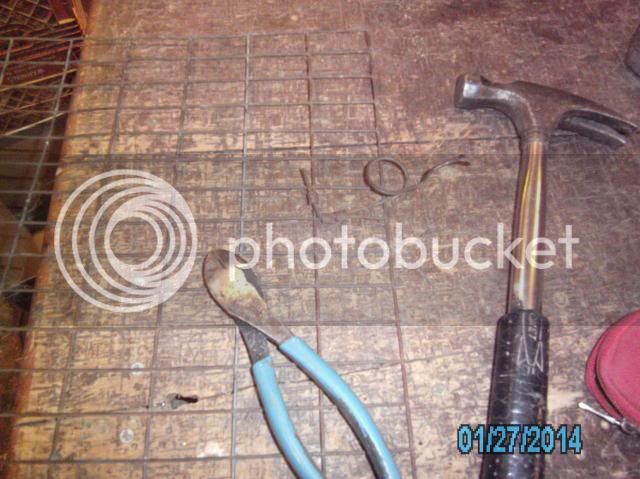
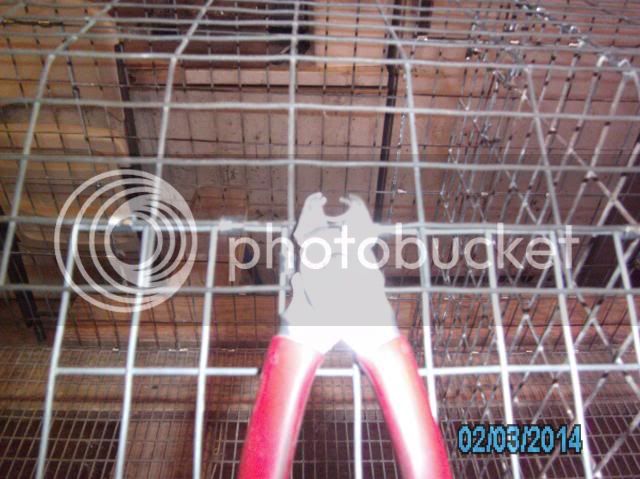
Keep a pair of good wire-cutters handy, in case you need them.
But use an awl and hammer to take the cages apart.

Reggie helped me a little on some of the work.
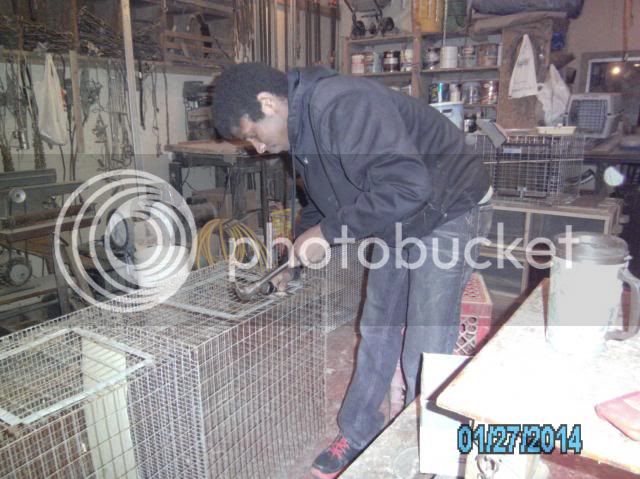
Take off the doors, spring-locks, edge guards, and set them aside.
They will be re-used on the new cage. Saves Money!!
NOTE: The cage "front" will now become the cage "back" for your new
cage. Just use scraps to fill-in-all-of-the-holes where your doors and
feeders used to go.
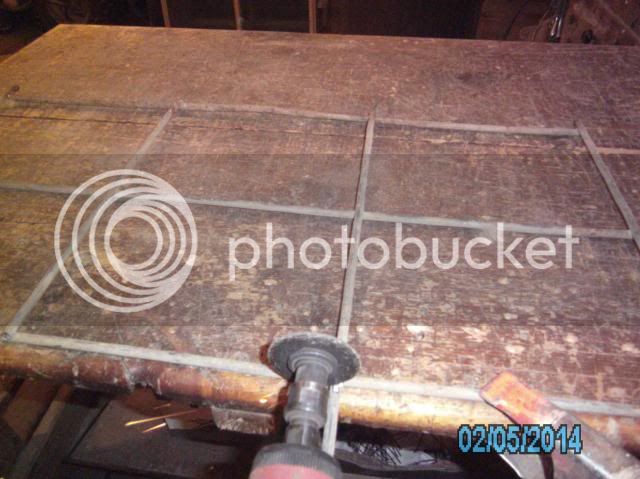
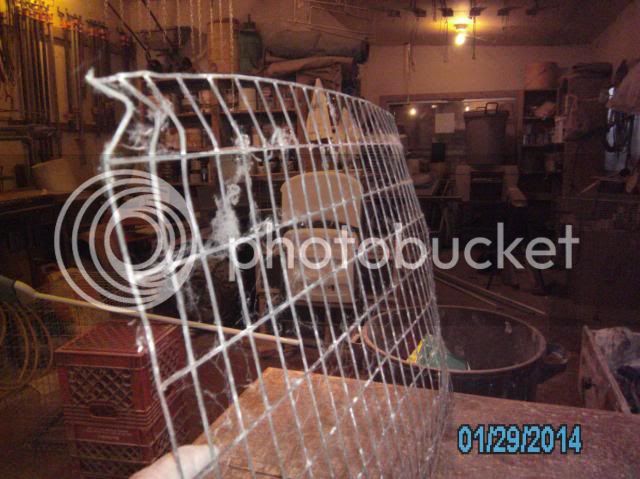
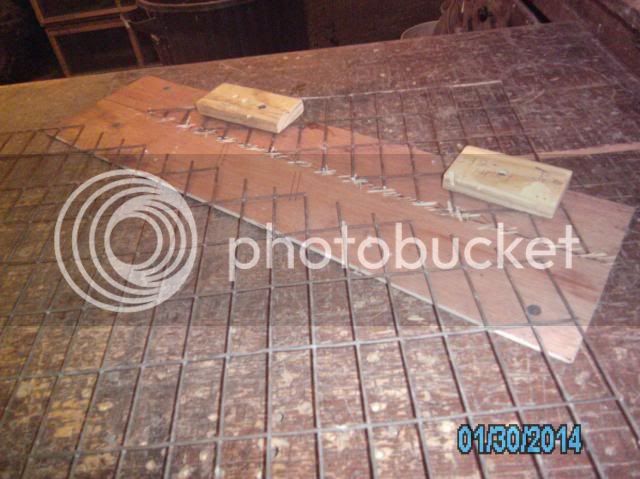
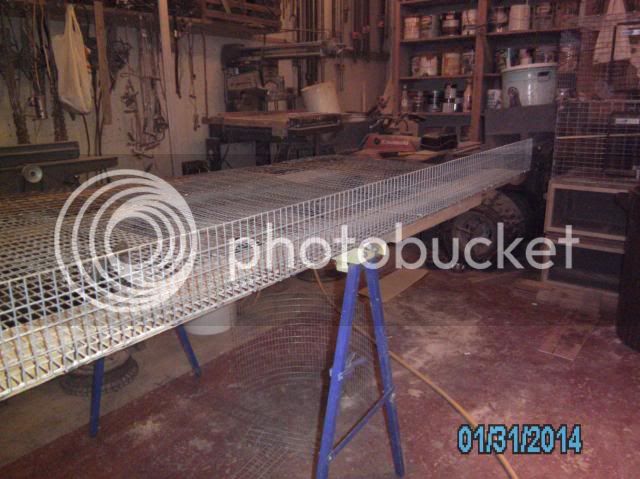
This condition is nothing unusual. Almost every panel needs to be
straightened and flattened.
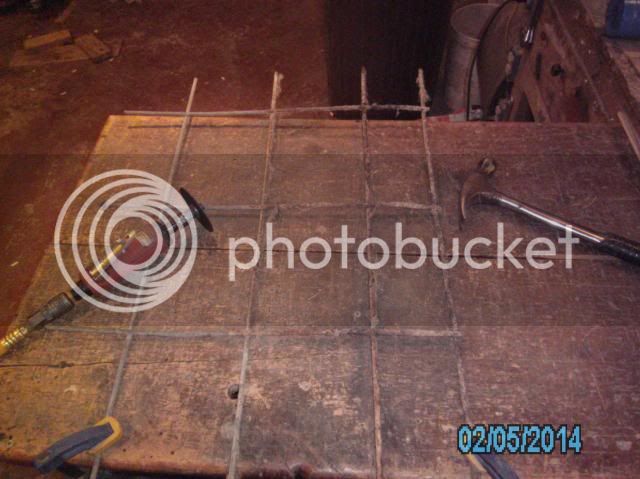
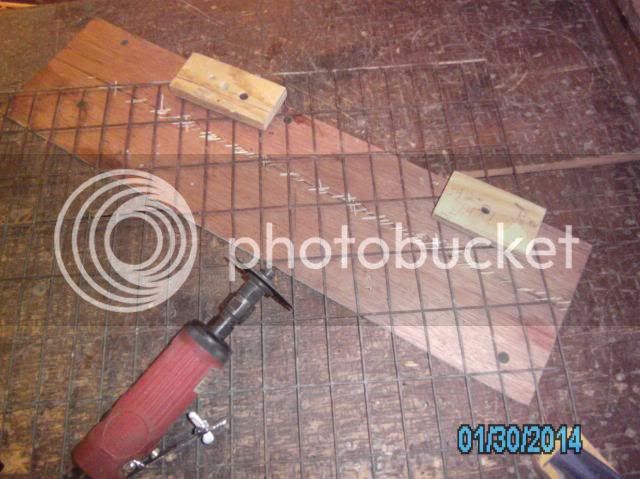
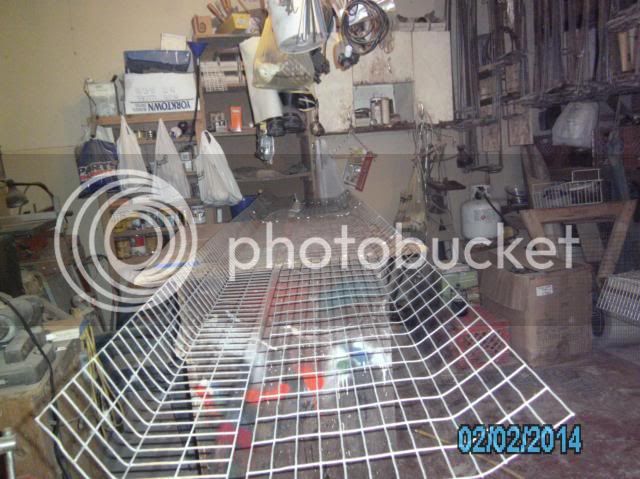
Here's a step that had a lot of questions asked. The angle on the side panels.
Clamp this solidly in place. You DON'T want this thing moving when you cut it.
For every 2" of rise, you've got 3" of run. Meaning every 4th upright, you've
got a welded joint to attach the slope panel to.
NOTE: There are other ways you can do this. Using a pair of good wire cutters
can accomplish the same outcome. You'll just have sharp edges to file off.
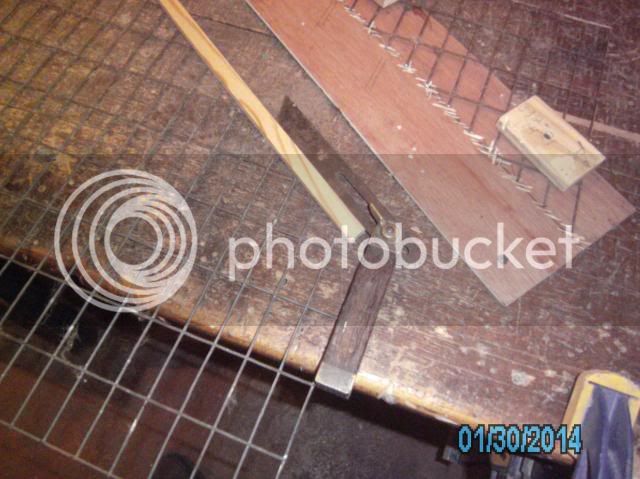
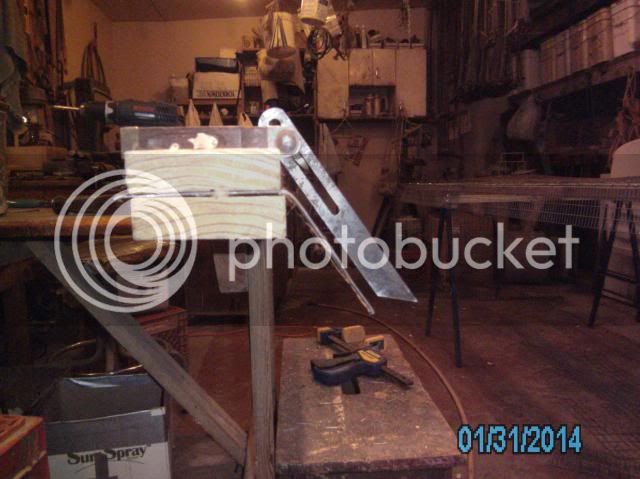
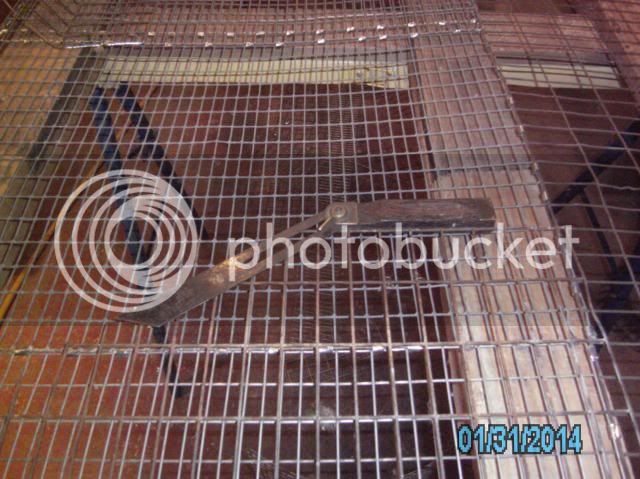
This tool is called a "bevel-square". It duplicates the angle you'll need to
bend the front angle on the cage front.
Set this aside someplace out of the way. You'll need this later.
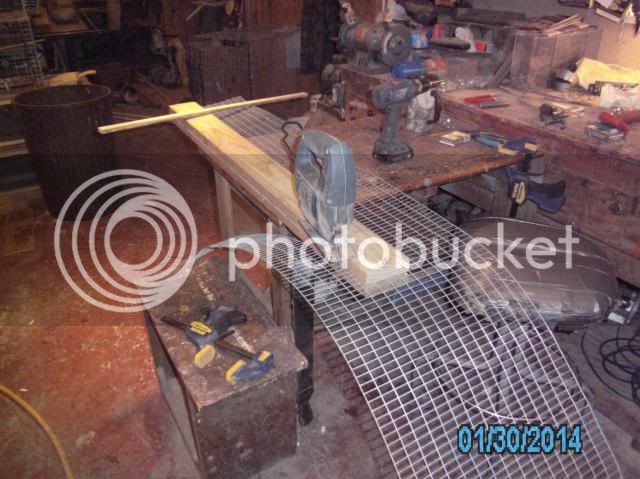
This 1/2"X1" wire is being cut into 4" tall strips for the front of the cage.
I believe it provides much more stability and rigidity for the front.
Compared to 1"X2" wire, it's stronger and less apt to "sag" over long periods of time.
Here it is attached to the floor wire.
NOTE: The five side panels have already been installed @30" intervals on the floor.
Next comes the rest of the front piece 10 foot long, 8 inches tall.
You can splice pieces together lengthwise for this.
Use 1"X2" wire with the 2" gap running vertical.
I use 2 boards 4 foot long to clamp the front piece with.
NOTE: The 1 inch gaps are on the "outside" of the bend.
The bend begins just past the 4" horizontal wire. This allows the
bend to come up even with or slightly above the angle on the side panel.

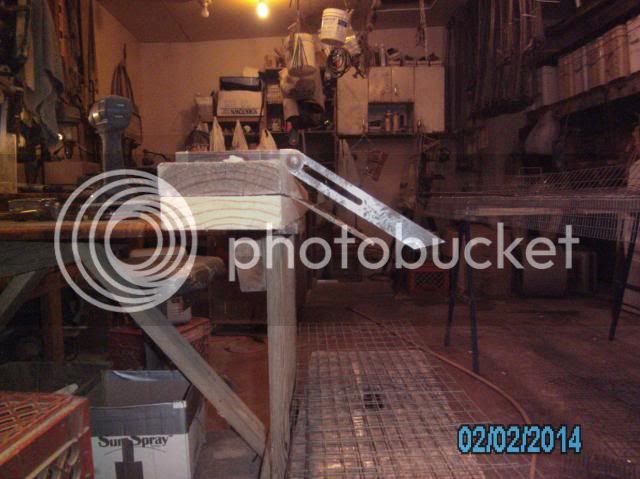
Use your bevel square to check for the correct bend in the wire.
Once this is done, change the bevel square to the angle on the top
of the side panel. They are different!
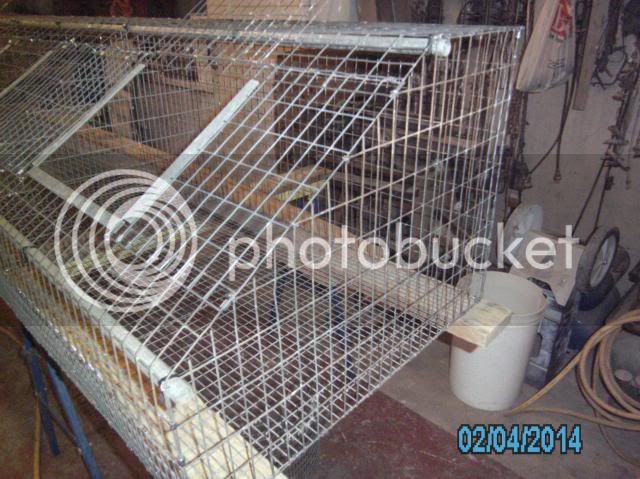
Next comes the top panel with the angle bent for the slope.
This is also 10 foot long. However, reverse the wire with the 2"
spacing running "with" the cage itself. This piece needs to be 13" wide.
Make sure the wire is bent with the 1" run wire to the "outside" of the bend.
You'll be able to attach the door much easier later on.
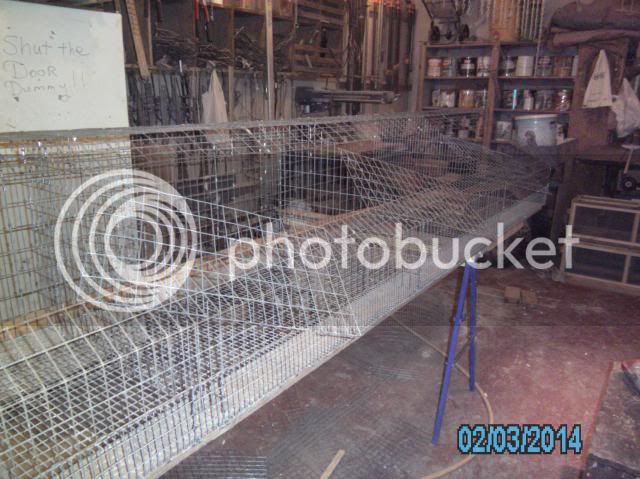
You've now got your two pieces 10 foot long with your angles ready.
Time to start making this mess look like a cage. Start clamping!!
Raise the back panel and clamp it and the side panels together.
Raise the 1/2"X1"X4" front-wire and clamp it to the side panels.
Place your two 10 foot pieces, top and bottom and clamp them in place.
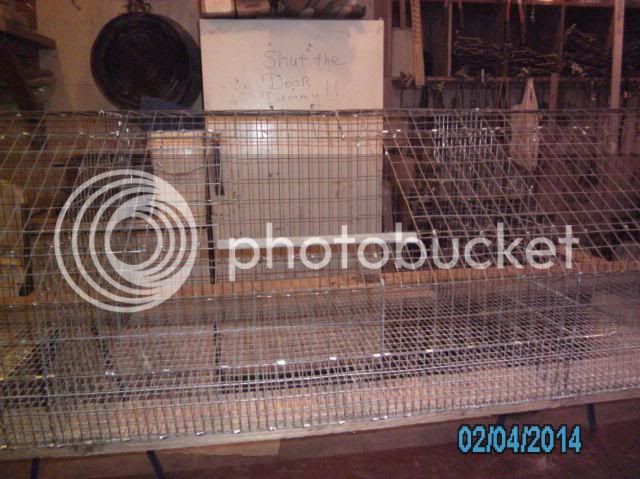
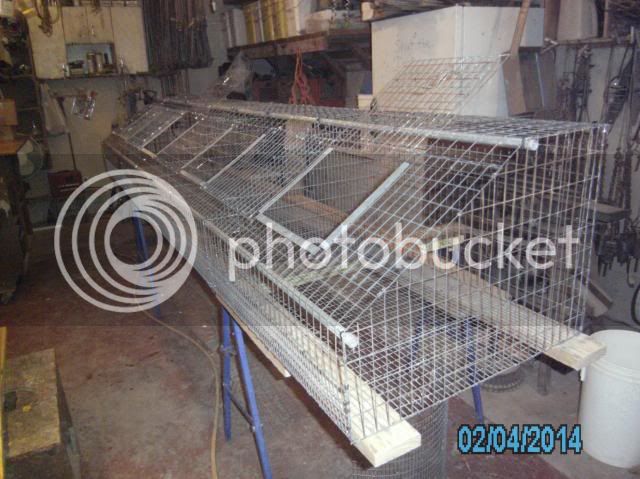
With all of this done, you'll have 4 basic pens with large gaping holes
where the doors should go. However, the openings are far too large.
You'll need to cut 3-12"tall--1"X2"X18" panels and 2-12"tall--1"X2"X9" panels.
They'll look something like these.
The two 9" panels are attached to the outer edges of the cage.
The three 18" panels are centered over each divider and clamped.
This will give you a 12" wide, 10" tall door opening for each cage.
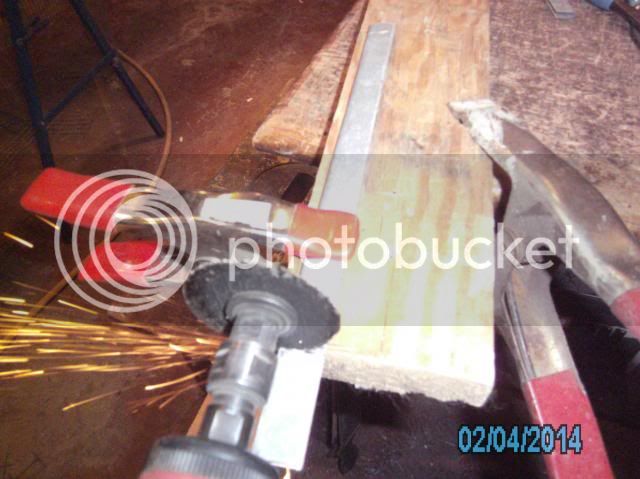
You can re-install the door guards.
You'll have to cut 2" off each of the upright door guards.
Here's where the clamp-rings come in handy.
You can see where the rings attach the side panels to the sloped front.
Re-attach your doors w/your repurposed spring latches.
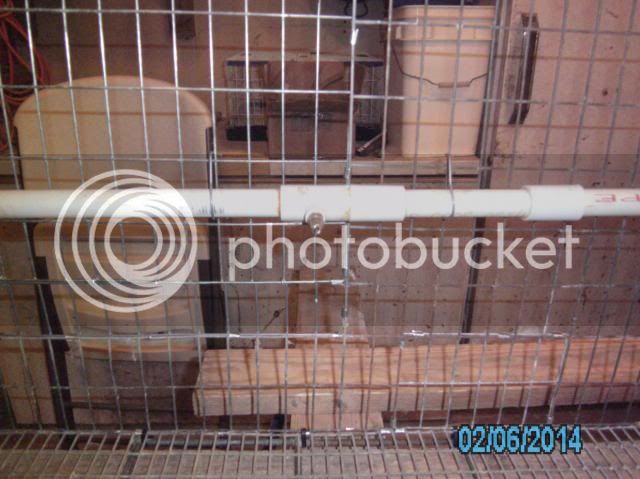
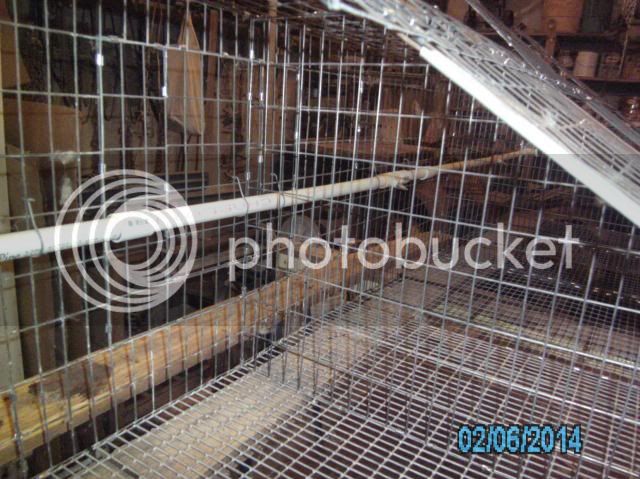
Add your galvanized steel conduit for strength and................
your about done!
I've still got to cut and install the floor spreaders I make out of
repurposed cattle panels. Plus do the water lines.
Any questions, just ask away.
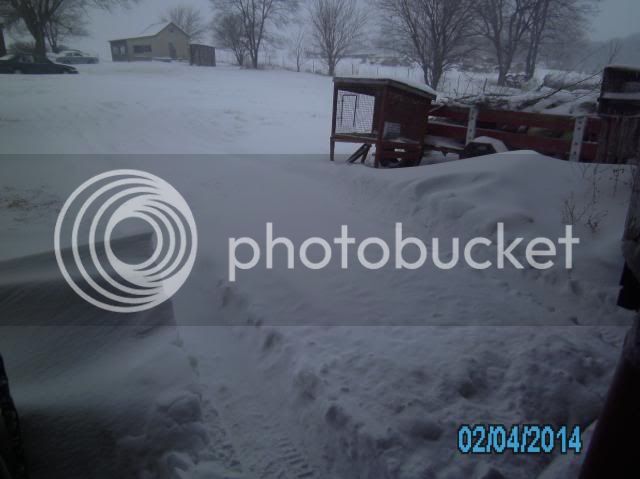
BTW: We got a bit of snow yesterday. I had to plough through
a 3 foot drift to get into the barn!
Years of abuse/neglect, leave them in less than good condition.
The one redeeming feature about these is the fact that the floor wire
is 14 gauge, galvanized AFTER welding. This wire lasts forever. If I'd
taken my time and did a little "negotiating", I could have gotten them
for a few bucks a hole cheaper.
I also keep my eyes open for larger single units. These take a beating,
but the bigger dimensions give me the opportunity to use longer spans
in some parts of my cage re-purposing. I spend a lot of time straightening
all of the bends and "crunches" out of them once they're apart.
Being single cages, they afford me one extra side panel per unit.
Keep a pair of good wire-cutters handy, in case you need them.
But use an awl and hammer to take the cages apart.
Reggie helped me a little on some of the work.
Take off the doors, spring-locks, edge guards, and set them aside.
They will be re-used on the new cage. Saves Money!!
NOTE: The cage "front" will now become the cage "back" for your new
cage. Just use scraps to fill-in-all-of-the-holes where your doors and
feeders used to go.
This condition is nothing unusual. Almost every panel needs to be
straightened and flattened.
Here's a step that had a lot of questions asked. The angle on the side panels.
Clamp this solidly in place. You DON'T want this thing moving when you cut it.
For every 2" of rise, you've got 3" of run. Meaning every 4th upright, you've
got a welded joint to attach the slope panel to.
NOTE: There are other ways you can do this. Using a pair of good wire cutters
can accomplish the same outcome. You'll just have sharp edges to file off.
This tool is called a "bevel-square". It duplicates the angle you'll need to
bend the front angle on the cage front.
Set this aside someplace out of the way. You'll need this later.
This 1/2"X1" wire is being cut into 4" tall strips for the front of the cage.
I believe it provides much more stability and rigidity for the front.
Compared to 1"X2" wire, it's stronger and less apt to "sag" over long periods of time.
Here it is attached to the floor wire.
NOTE: The five side panels have already been installed @30" intervals on the floor.
Next comes the rest of the front piece 10 foot long, 8 inches tall.
You can splice pieces together lengthwise for this.
Use 1"X2" wire with the 2" gap running vertical.
I use 2 boards 4 foot long to clamp the front piece with.
NOTE: The 1 inch gaps are on the "outside" of the bend.
The bend begins just past the 4" horizontal wire. This allows the
bend to come up even with or slightly above the angle on the side panel.
Use your bevel square to check for the correct bend in the wire.
Once this is done, change the bevel square to the angle on the top
of the side panel. They are different!
Next comes the top panel with the angle bent for the slope.
This is also 10 foot long. However, reverse the wire with the 2"
spacing running "with" the cage itself. This piece needs to be 13" wide.
Make sure the wire is bent with the 1" run wire to the "outside" of the bend.
You'll be able to attach the door much easier later on.
You've now got your two pieces 10 foot long with your angles ready.
Time to start making this mess look like a cage. Start clamping!!
Raise the back panel and clamp it and the side panels together.
Raise the 1/2"X1"X4" front-wire and clamp it to the side panels.
Place your two 10 foot pieces, top and bottom and clamp them in place.
With all of this done, you'll have 4 basic pens with large gaping holes
where the doors should go. However, the openings are far too large.
You'll need to cut 3-12"tall--1"X2"X18" panels and 2-12"tall--1"X2"X9" panels.
They'll look something like these.
The two 9" panels are attached to the outer edges of the cage.
The three 18" panels are centered over each divider and clamped.
This will give you a 12" wide, 10" tall door opening for each cage.
You can re-install the door guards.
You'll have to cut 2" off each of the upright door guards.
Here's where the clamp-rings come in handy.
You can see where the rings attach the side panels to the sloped front.
Re-attach your doors w/your repurposed spring latches.
Add your galvanized steel conduit for strength and................
your about done!
I've still got to cut and install the floor spreaders I make out of
repurposed cattle panels. Plus do the water lines.
Any questions, just ask away.
BTW: We got a bit of snow yesterday. I had to plough through
a 3 foot drift to get into the barn!
 ldtimer: