Watering system PVC schedule#40 pics. Beginning to end.

Rabbit Talk  Forum

Help Support Rabbit Talk Forum:

This site may earn a commission from merchant affiliate links, including eBay, Amazon, and others.

grumpy

Well-known member
Joined
Jan 25, 2012
Messages
2,004
Reaction score
19
Location
plattsburg, missouri
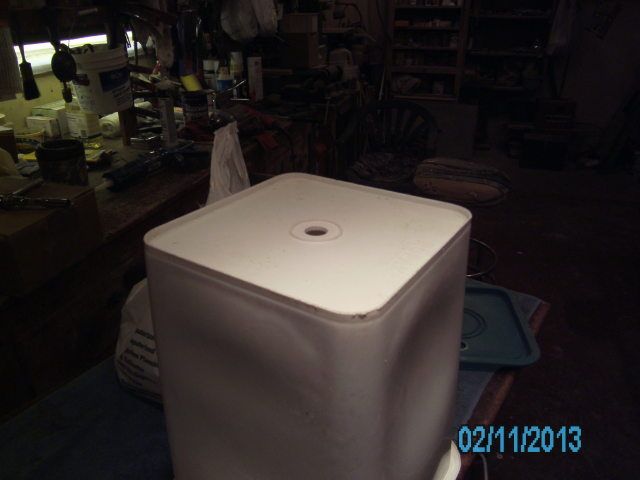
I just picked a small bucket for this demo. I used a 3/4" spade bit to drill the hole.
The thin walls of these smaller buckets make them suseptable to leaking.
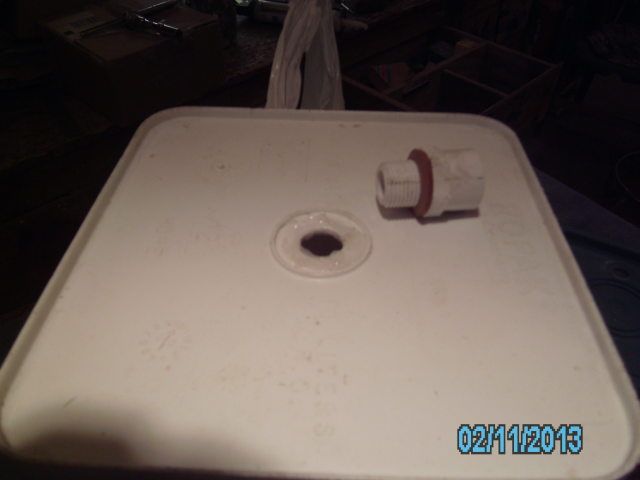
NOTE: All pipe and fittings are 1/2" Schedule 40 PVC
SANY0008_zpsb9a1a349.jpg


The nipple is a threaded male end with a garden hose washer on it.
I added a little silicone sealer around the edge to make sure it was water tight.
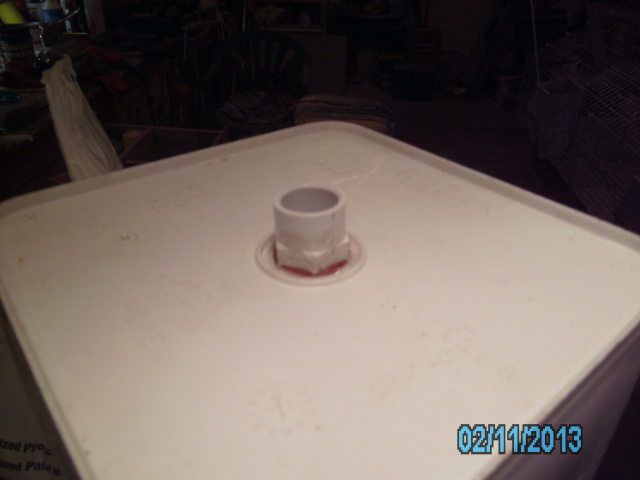
The PVC is harder than the bucket material. It will self-thread into the hole.
SANY0009_zps46a00d97.jpg


You must use a fair amount of pressure to do so.
Here's a pic with the nipple threaded into the bottom of the bucket.
SANY0010_zps539951f4.jpg


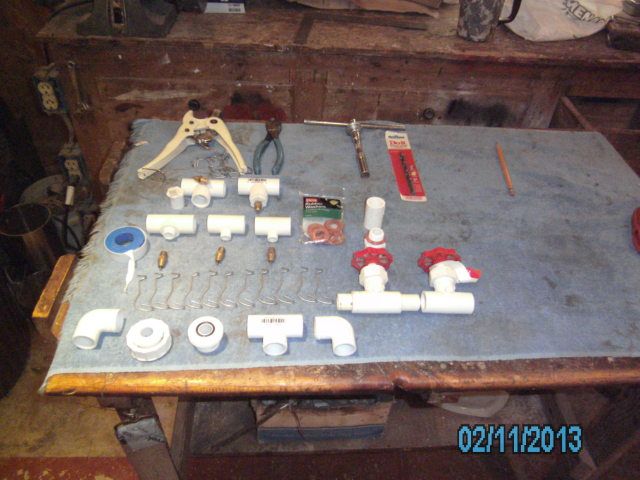
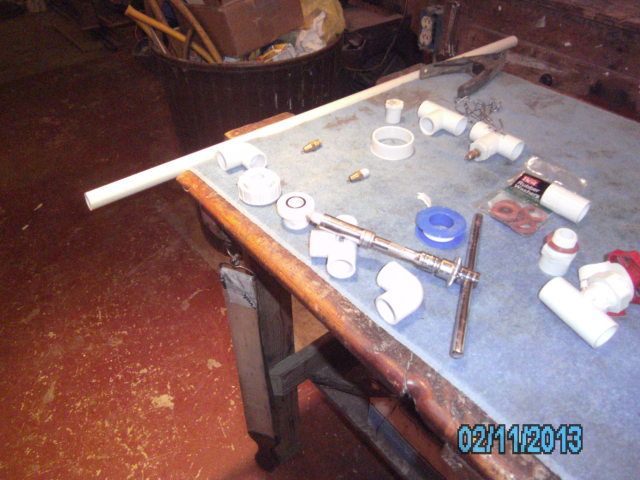
Here's the materials needed to make the system. I have two 10' lengths of pipe also.
SANY0011_zps003d540c.jpg


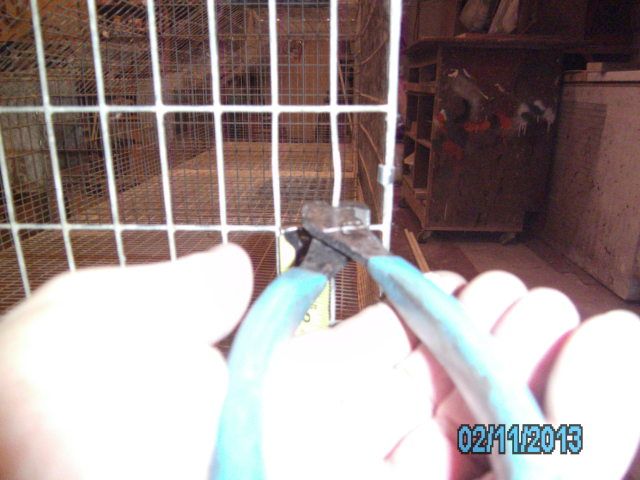
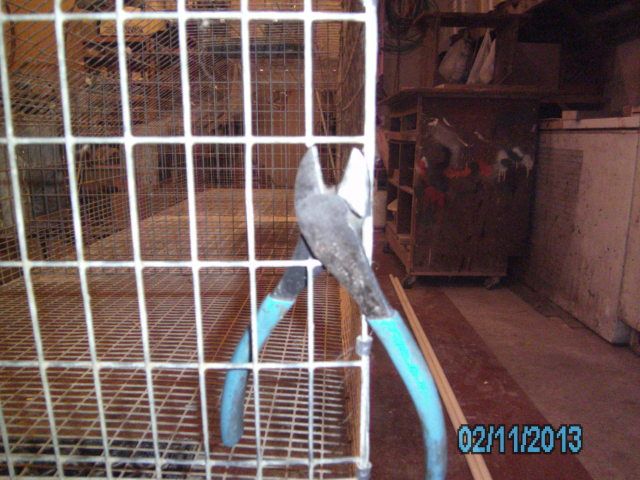
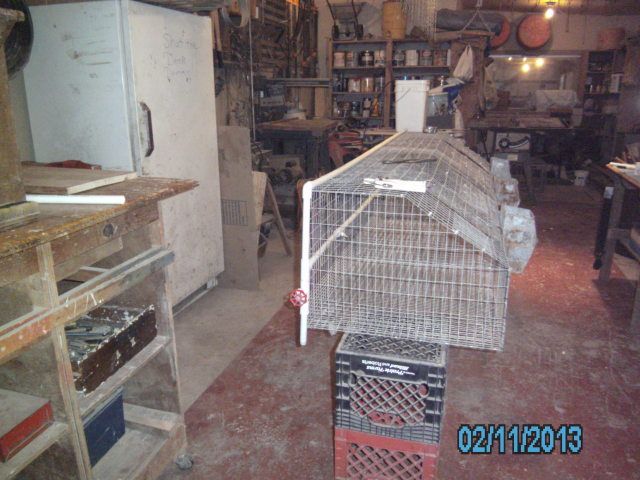
Eight inches up from the floor, remove the wire to give you a 2"X2" opening.
Each side panel must have this done to slide the pipe and nipples through.
SANY0015_zpsb4f16922.jpg

SANY0016_zps6fbd0f13.jpg


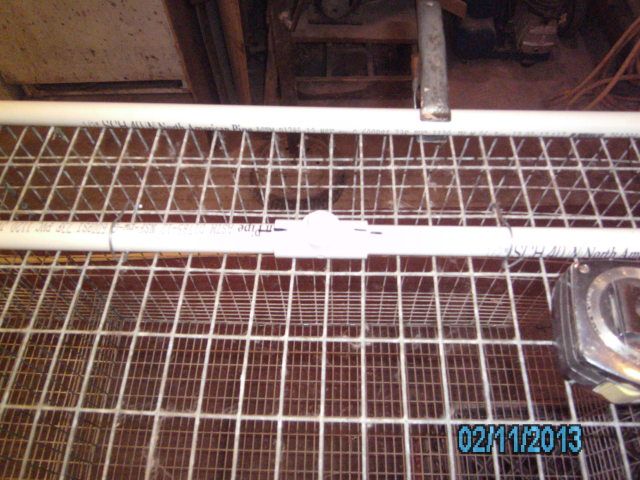
Center each water "T" on each section. Cut the pipe to fit, add an extra inch for gluing.
Lock the sections in place with the pipe holders. Line up all T's the same.
You can use a marker to make sure they'll be lined up when you glue them.
SANY0022_zps509abef2.jpg


Glue the entire length together. Keep all of your marks in line.
Install the line into the cages and use your wire clips to hold it in place.
Make sure you've got a slight angle down on your T's.
SANY0023_zpsecfc2b10.jpg


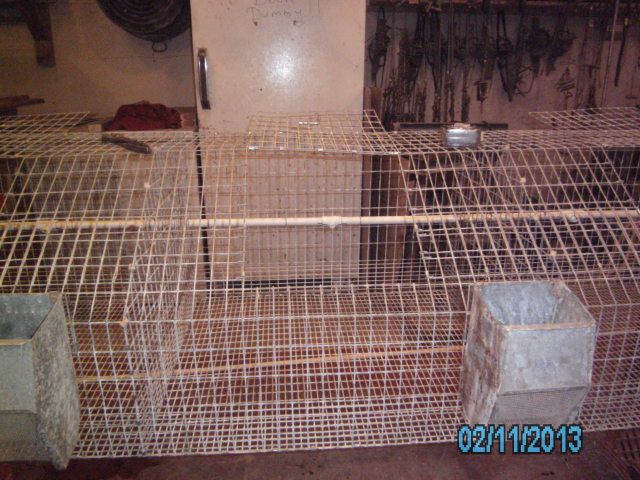
You can turn the water line to pick-up another row of cages.
Or you can put a drain valve in along with your return line.
BTW::Those drain valves are excellent for filling up auxillary water bottles that you can attach to the cages when the youngsters begin coming out of the nest boxes.
SANY0033_zps4fc0049d.jpg


Install your water nipples. Be careful not to cross-thread them.
Add a winding or two of teflon tape to the threads. It takes a 7/16"
socket to tighten them. DON'T OVER-TIGHTEN.
SANY0025_zpse2703222.jpg


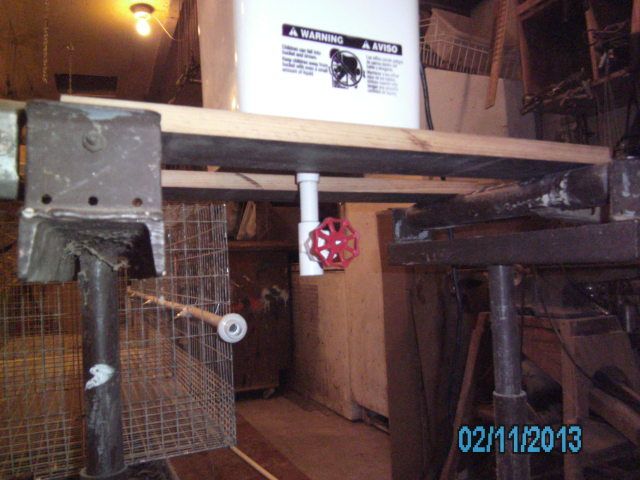
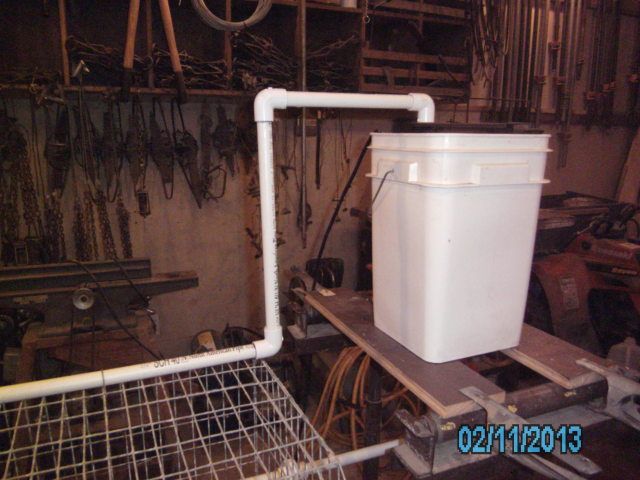
Build a stand or closet for your water bucket. Install a shut-off valve.
I use a coupling to attach the water line from the bucket to the
water line in the cages.
SANY0032_zpsd912e4c7.jpg


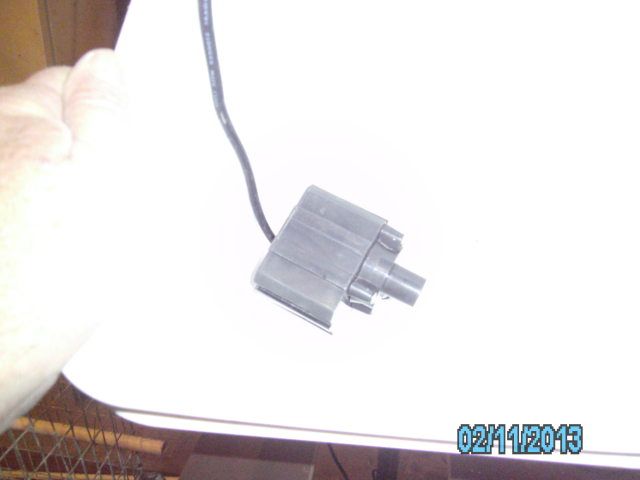
Here's the pump with a threaded female adapter attached. Use a small pipe
nipple to attach to the coupling in the bottom of the bucket.
SANY0030_zpse2f3cb24.jpg


The pump is in place in the bucket. Sorry for the crappy pic.
It didn't turn out too good.
SANY0031_zps169d792a.jpg


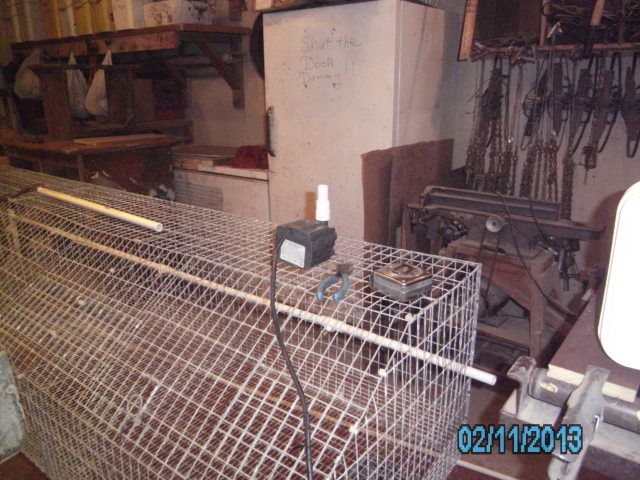
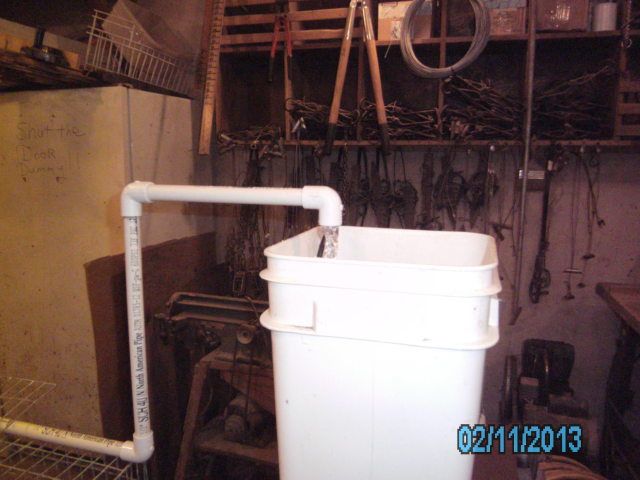
Water return line is hooked up and glued. Almost ready!!
SANY0035_zps530dcb80.jpg


Water is in the bucket. Pump is turned on! We're off and running.
SANY0036_zpsda528582.jpg


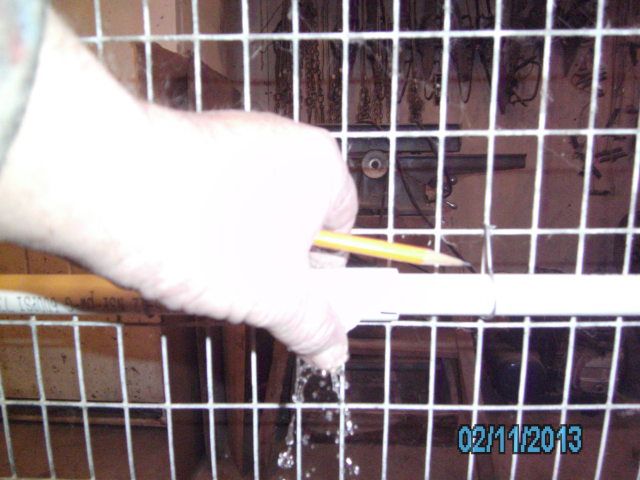
Good water pressure on the water valves.
SANY0037_zpsdbef3843.jpg


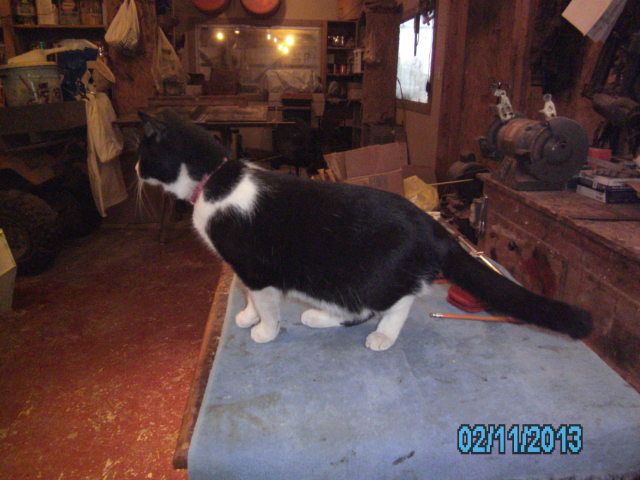
Boots says "Hello". She's a big girl now!
SANY0014_zpsa45d5c84.jpg


Hope this helps some of you. Any questions feel free to ask. I'll do my
very best to answer them.

Grumpy.
 
Do you install a secondary line of lower nipples for doe cages? If not, how do the kits access the water?
 
MamaSheepdog":1dpritvl said:
Do you install a secondary line of lower nipples for doe cages? If not, how do the kits access the water?

Good point, MSD.

No....a lower line of water valves would be activated by the doe rubbing her body on them. Surprisingly enough, the youngsters will "s-t-r-e-t-c-h" and get a drink. ALSO, they're quick to use mama as a step-stool. For the longest time, (too long to be truthful about it) I left the cages alone and let the kits learn on their own.

It worked, but I realized that they may not be getting enough water as it stood. So, whenever a litter starts leaving the nest, I add a water bottle to the front of the cage. In real cold weather, I'll put a brick on the cage floor under the valve. The youngsters hop right up and easily get themselves a drink of warm water. It's worked real well thus far.

They're pretty good sized by the time they're up and foolin' around.

grumpy.
 
When we installed our original system, I had no idea that rabbits would drink more according to the height of the water nipple. Mine are at about 2" currently, and occasionally a rabbit will lay against one, but not too often. Additionally, my valves are parallel to the floor wire- I never considered angling them.

A freeze blew out the north side of our system, so it will be replaced. My plan is to run one pipe through the top tier of cages which are back to back, with nipples on opposing sides, and two lines on the bottom tier due to the distance between them.

I have my pond pump already, and I also have the same heater that I have seen in some of your former pictures, so now I only have to get Hubs motivated to fix the system. :roll:
 
:thankyou:

I'll be bookmarking this thread for future reference.

Can you list the "materials" you used in that photo? Some things I recognize but others I have no idea.

Where did you get the water nipples? What kind are they?

What kind of pump is that? What is the strength?

The pump with the threaded female adapter attached ... is attached to .. ? Inside the bucket?

I know that's alot of questions but I wanna make sure I do this right! :cool:
 
Beekeeper10":1iq12x79 said:
Hi grumpy
Thanks for the pics and tutorial.

Will aerating the water cause any problems?


No, Beekeeper. If anything it is beneficial. Never, Never, had an ounce of trouble with this system affecting the health of the rabbits.

grumpy.

__________ Tue Feb 12, 2013 6:53 am __________

cnichols":1iq12x79 said:
:thankyou:

I'll be bookmarking this thread for future reference.

Can you list the "materials" you used in that photo? Some things I recognize but others I have no idea.

Where did you get the water nipples? What kind are they?
You can get them from http://www.klubertanz.com The PVC nipple is #A-224. The water valve is #AD-20
What kind of pump is that? What is the strength?
Here's the web-address and pump# http://www.water-garden-shop-relaxingde ... detail.htm
The pump with the threaded female adapter attached ... is attached to .. ? Inside the bucket?These are standard 1/2" Schedule#40 CPVC pipe fittings. Standard couplings with one end threaded and the other regular slip-fit. The pump has a Male threaded nipple. The nipple going through the bucket bottom is also a Male threaded nipple. You use a coupling nipple on both the pump and the nipple in the bucket bottom. Then just a short piece of pipe to slip-fit the two together inside the bucket.

I know that's alot of questions but I wanna make sure I do this right! :cool:

NOTE: My entire rabbitry consists of only two breeds. NZW's and Californians. The water supply system I use was developed by Paul Mannell the Owner of Colonial Acres Rabbitry. This commercial rabbitry produced over 12,000 fryers per year. Plus breeding stock sales and supplying laboratory stock to major medical research facilities. He started with nothing and developed a 1000 hole rabbitry in less than three years. He's the author of HOW TO START A COMMERCIAL RABBITRY. Paul was probably one of the premier commercial rabbit breeders of his time.

The set-ups I use were developed by Paul. I've integrated some of the more modern methods of pumping and heating water. However, all of the rest was developed by this man. Up to and including the measurements for heigths from the floor to the water supply. To say Paul was successful would be an understatement.

The methods and reasoning behind what I do aren't arbitrary. They are based on the success of one of the best commercial rabbit-men in the history of commercial rabbit production. His entire livelyhood was produced by his rabbitry. He partnered with Mr. Bass (The original owner and founder of Bass Rabbit Equipment) and together they worked hand in hand developing many of the successful methods most commercial breeders use today.

Paul Mannell led by example. I follow by example. An example that was established over 50 years ago. What I do and why I do it has very sound and solid reasoning behind it. There is little to no supposition in my methods.

grumpy
 
Oh! One more question. The bucket ... you said the thin walls of that bucket make it suseptable to leaks. What type of bucket would you recommend? Would a 5 gallon paint bucket work? Like one from Lowes or Home Depot?

Also, an idea to add to this whole bucket set-up. In my automatic chicken waterer, I've installed a toilet tank float valve that I've connected to a hose. This keeps the water level up in the bucket without me having to check on it very often! :) I just might add something like that to this set-up. Do you see any issues with doing that?
 
PistolPackingMomma":1qofb4b4 said:
Is there any issue with water staying in the pipes and having mold/algae growth?

I've never witnessed this problem. Again, with the system I've developed, there is no direct, nor indirect sunlight that hits any of the tanks. I've got two water barrels in my heating cabinet. One is a blue 55 cut to 45gallons. The other is an opaque white that holds 30 gallons. With the pumps continually pushing water through the system, there no chance for stagnation.

During the summer, I turn off the heat source. However, I do keep the pumps running as I believe it is a positive over a gravity fed system. I like the water continually moving.

I've heard the comment "back-wash" when the rabbits drink and possibly contaminating the entire water system. I would find it difficult, if not impossible, for this to occur when there is any form of water pressure on the lines. The pumps provide this pressure.

MSD: A float valve would be a plus for a water reservoir that could possibly be emptied in a 24 hour period. I bought the makings for one a few years ago. It's still the the sack in my shop. The barrels I use guarantee that I won't run out of water from one day to the next. 40 does w/youngsters can go through about 25 gallons of water a day. 150-200 youngsters, 6 to 11 weeks old, gulp nearly 35 gallons a day. Of course you'll have those that like to "play" with the valve and keep it dribbling more than it needs to be.

cnichols: My first water tank was a 6 (six) gallon tall paint bucket in a 15 doe rabbitry. You've got to keep a close eye on the water levels. With youngsters, they can drain one down pretty quick. Yes: The bottom of the bucket is thick enough to handle the pipe nipple. Just make sure you use a 3/4" spade bit. Get one that has those "daggers" on the outside edges of the bit. They'll cut the circle before the flat part of the bit hits the plastic. Never try to install a pipe nipple on the side of a bucket. It almost always leaks.

Tommorow, I plan on cutting large windows in the bucket I used for the diagram. I will take more time and detail on the pipe nipples and how to set up the pump. I was in a bit of a rush yesterday trying to get all of it together along with the pics. It took me nearly two hours to cut and set-up the system. I didn't start until after lunch on the project.

grumpy
 
grumpy":4f9r4kjp said:
A float valve would be a plus for a water reservoir that could possibly be emptied in a 24 hour period.

My system is hard plumbed to a small bucket, so we definitely need the float valve to keep it full. :)

grumpy":4f9r4kjp said:
Just make sure you use a 3/4" spade bit. Get one that has those "daggers" on the outside edges of the bit.

I also like to drill a small pilot hole so there is no "drift" of the bit before it bites into the plastic.
 
grumpy":3pglpbjb said:
Never try to install a pipe nipple on the side of a bucket. It almost always leaks.

:laugh2: Funny you should mention that. Remember the chicken waterer that I need to "re-work"? That's why!! I tried to put it in the side of the bucket and it leaks like a sieve. Epic Fail. I just need to get a few different fittings to fix it, but it's been one of those things on the bottom of the list for a while and just hasn't gotten done.

I was planning on putting the float valve in the rabbit water system like I did with the chicken water system. We've got plans to run water out to that area and put in a hydrant so it won't be an issue splitting it :)

Glad I have about a dozen buckets around here! They come in handy for so many things. Now I know to reserve one or two for the rabbit barn! :)
 
MamaSheepdog":2oa99dis said:
grumpy":2oa99dis said:
A float valve would be a plus for a water reservoir that could possibly be emptied in a 24 hour period.

My system is hard plumbed to a small bucket, so we definitely need the float valve to keep it full. :)

grumpy":2oa99dis said:
Just make sure you use a 3/4" spade bit. Get one that has those "daggers" on the outside edges of the bit.

I also like to drill a small pilot hole so there is no "drift" of the bit before it bites into the plastic.

I'll post a pic of that spade-bit MSD....It's awesome and wicked lookin!

grumpy
 
cnichols":1tkezz0r said:
grumpy wrote:
Never try to install a pipe nipple on the side of a bucket. It almost always leaks.


:laugh2: Funny you should mention that. Remember the chicken waterer that I need to "re-work"? That's why!! I tried to put it in the side of the bucket and it leaks like a sieve.

I must be inordinately lucky... I made bucket waterers for my growout pens, and unless the bucket slips down and the nipple is bearing the weight of the bucket, they have worked fine. I used a LOT of teflon tape though!

It isn't due to a vacuum either, because I used a spade bit to drill filling holes in the lids of the buckets. I hot glued screen on the holes to prevent debris from getting into the water.

IMG_7623.JPG

grumpy":1tkezz0r said:
I'll post a pic of that spade-bit MSD....It's awesome and wicked lookin!

If you jam the tip into the plastic or wood they don't drift, but if you can't- (cuz yer a girl ;) ) - or the plastic is very hard... I like a pilot hole rather than risk scratching up the surface. (That's my "retentive" side rearing its ugly head again!)<br /><br />__________ Tue Feb 12, 2013 3:41 pm __________<br /><br />Edited to add: The dark matter you see at the bottom of the bucket is Diatomaceous Earth. I read that it helps prevent algae growth, and for the most part it has. The buckets have been up since this summer, and there has been very little growth. The DE is now very dark and "dirty" looking though.
 
MSD: Your water nipple requires a much smaller hole. That should seal fairly easy. Plus....it looks like you went into the "thicker" area of the bucket. Down low....the thickness on the sidewalls is a hair larger than farther up the sidewalls.

A pipe-nipple requires a 3/4" hole. On a rounded surface like the side of a bucket....you'll end up with leaks a large percentage of the time. It's over two and half times bigger than the water nipple.

Grumpy.
 
Great tutorial grumpy. Question off the top of my head. Does the pump help keep the water unthawed during the winter since the water is constantly moving? Also, does this system still work, at least for a time, if the power goes off?

O, and another one. What type of nipples are those?
 

Latest posts

Back
Top