


PART 1
So I finally pushed myself into tanning the rabbit hides so I could make something with all the rabbit fur laying around in the freezers. I figured since this is my first time I would do a step by step not only for the people who don't know what to do or to show people what NOT to do but also so that if I did end up miraculously doing this right....that I would know what I did so I could do it again. :?
So first things first. I am going to give due credit where it is deserved. I'm not making this process up myself but I am taking it from http://www.taxidermy.net/forum/index.php/topic,56668.0.html. This is the absolute best one I could find and gives a wonderful breakdown that even someone of my limited intelligence can understand...for the most part. The only thing it doesn't include are pictures and mistakes. That's where I come in at. Now when it comes to the tanning process I decided to go with the EZ tan solution. It was reasonably priced and it is easy to use. Plus it's what she used so if I was going to use her instructions to the tee I might as well use the solution as well.
I began with 4 hides. Three were frozen and 1 was being salt preserved. I let the one that was being salt preserved sit in a 5 gal bucket of a water/salt solution which consisted of 1 gal water with 2 lb of salt for about 6 hours. While that was sitting in the bucket I sat out the other 3 hides that were in the freezer to let them thaw.
After the thawing and relaxing (process by which the salted pelt is returned to a semi-flexible state) was done I put all 4 pelts in a tote filled with 3 gal of water. Below is the pic of the pelts in the tote. The yellow looking thing you see in there is the salt preserved pelt. The EZ tan system says to use 1/2 oz of the acid for every 1 gal of water. So in went 3 tbsp of the acid. (One tbsp = 1/2 oz. 1/2oz x 3 gal = 3tbsp.) Along with that went in 3lbs of salt which I had to ended up running to Meijer to get because TSC doesn't carry anything it's supposed to.
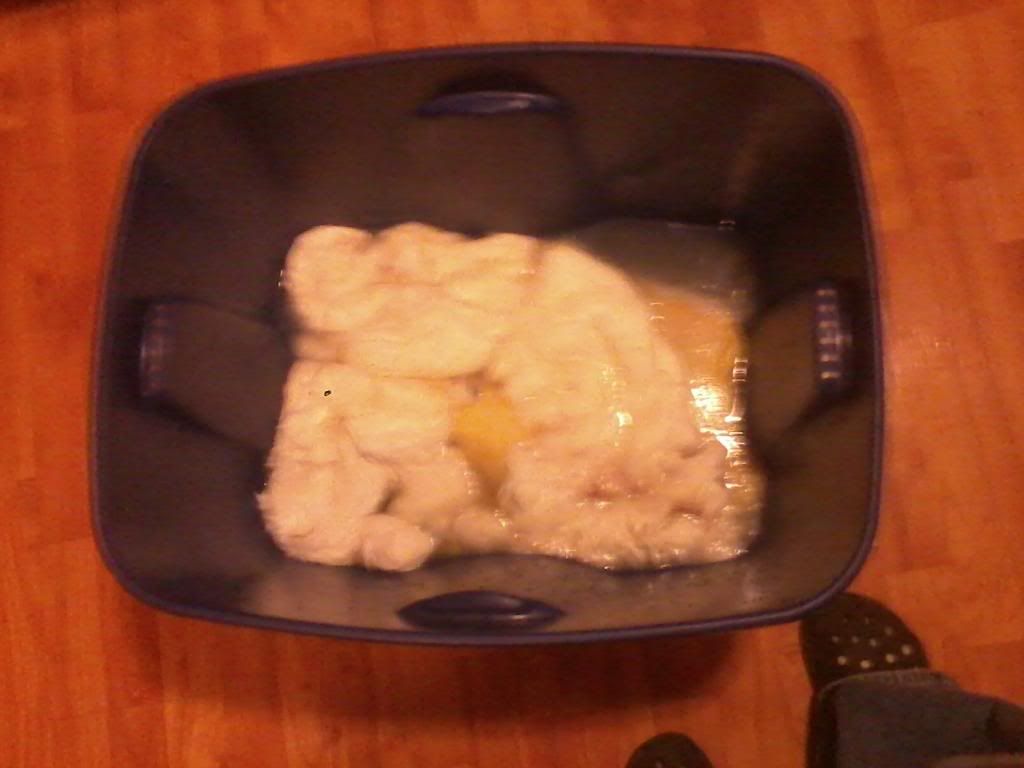
The PH level of the water is supposed to be around 1 but not above 2.5 or 3 as that will allow the bacteria to grow. (Again, this is taken from the previously mentioned website.) My PH testing strips start at 6 and go to 9 so...learn from my mistake and check to make sure your tester has a low enough reading. Tomorrow I will go find some that actually read what I need and pray that my solution is correct. In the mean time I stir the pelts around occasionally just to make sure the acid is able to penetrate everywhere and nothing is hiding.
PART 2
Ok, so the hides have soaked for 48 hours. Now it's time for the work to begin, unless you have a fleshing machine. In which case, I don't like you. :angry: If you don't have a fleshing machine or a fleshing knife, (basically just a knife with a handle on both ends,) then just use a dull knife. I had a metal butter knife and another dull knife with me. WHERE GLOVES! It's acid! You're hands will thank you later.
Since rabbit hides are so thin there really isn't much fleshing to do, compared with a deer. However, if you had a fat rabbit that you are now trying to flesh, you will cuss that rabbit. In the fleshing process you want to get as much of the fat and muscle off the skin as possible. The more you get off the better and softer the pelt will turn out. That said you don't want to go too deep, because with the pelts being thin you are likely to go through the pelt, which really sucks. The process I used to flesh them was just to scrap as much of the flesh as possible up, then peel, little by little so as to take large scraps at a time. Slow and steady wins the race. Patience is your friend here, call her. Remember, don't go too deep. The fryer pelts, (12 weeks for me) will be a bit tricky especially where the belly was but don't worry too much. Get the fat and muscle.
As noted before I had 2 different types of pelts, one that was salted and others that were frozen. The salted pelt came from a 1 1/2 year old doe. Once does get so old their hides begins to thicken up. Don't ask me when this is because I don't know. I do know it's after 12 weeks.
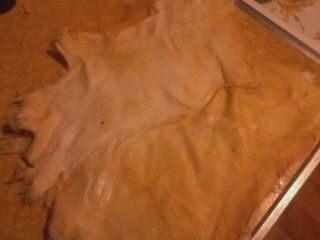
This is the picture of what the salted pelt looks like after it has sat in a pickle for 48 hours.
This is what the salted pelt looks like when half of it has been fleshed.
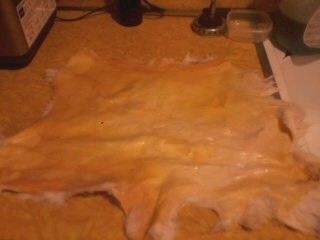
Next is a frozen pelt that has been sitting in pickle for 48 hours. Probably can't tell too well from the picture but the skin is whiter than what it was before you put it in the pickle, and more plump.
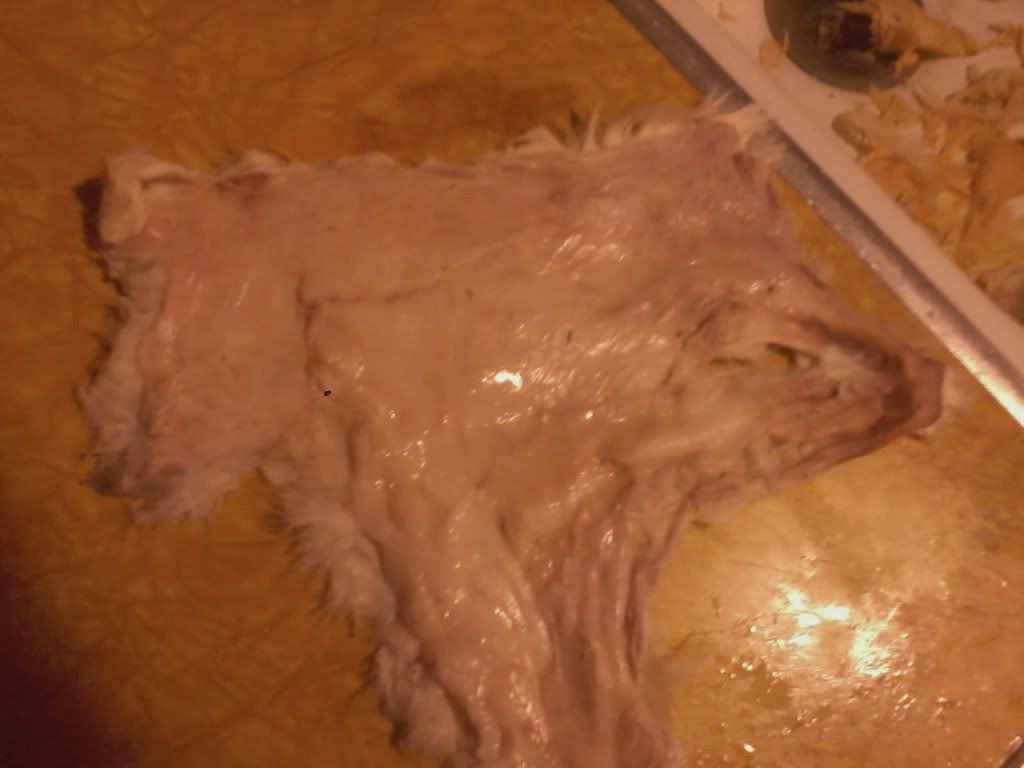
This is what the frozen pelt looks like after it has been fleshed. Remember what I said about 12 week old skins being thin? Look at the bottom of the picture to see a nice hole I put in it. Learn from my mistakes as I said earlier and be very careful with these pelts. No too much needs to come off. Just the fat and the muscle. You go too low and you get this.
After you are done fleshing the pelts put them back in the pickle solution for another 24 hours. Make sure you check the PH level again and do a bit of stirring when you walk pass or get a free moment. This allows the pickle to penetrate to the areas that are now freshly exposed and kill the bacteria too. You don't kill the bacteria and you have slippage (fur coming out in clumps).
PART 3
After I kept the pelts in the pickle for another 24hours ish, (it was actually a bit longer because I didn't want to do this at 12am,) you take them out and let them drain. When I took mine out I made sure to SQUEEZE out the pickle back into the tote it came out of. Notice I said SQUEEZE not ring. As I've said, rabbit pelts are thin, if you ring you take the chance of ripping them. That isn't a chance I'd want to take after all this waiting and work. I hung them above the bathtub so that when they drained the left over pickle would just fall into the bathtub.
This is what they look like after their second pickle soaking, squeezing and being hung. Mine still looked like they had places that started to swell from being in the pickle again but I just left those areas alone since I didn't want to open up anymore spots that the pickle might not have been yet.
While they were hanging up I went and tried to prepare the neutralizing solution. I didn't really understand the directions from Amy though so this was a bit of a challenge. In the directions she said to add 1 tablespoon of baking soda to every gal of water "needed to submerge the skins". I thought she was saying to make completely different batch and just put baking soda in it. That didn't really make since to me but I didn't want to ruin the pickle mixture if I needed more so I mixed 3 gal water w/ 3 tbsp baking soda and it came out to a PH of 11. Yep, that's definitely not what she meant. So I took a few tbsp of the pickle and put it in my new solution. Went to a PH of 10. I don't like wasting money and this wasn't going anywhere since the solution is supposed to be at a PH of 4. I took the pickle and added 3 tbsp of baking soda and got a PH of 8. So since we didn't have anymore pickle, as that is what we were using, I added some acid, which made it go down to PH 1. Sigh..OK, add baking soda for get 6, little acid, 5, little acid, 5 little acid 4! BINGO! It took longer than that. We used 18 PH strips to test it. Learn from my mistake. Use the pickle solution and just add a little bit of baking soda to it, testing each time. That should save a bunch of time.
The pelts stay in the solution for "NO MORE" than 20 min and I occasionally stirred. For the reason refer to Amy. She writes it better than I could.
When the time was about up I starting taking pelts out and rinsing them off well. I just stuck them in the sink and sprayed them off with cold water until I was satisfied.
After they were rinsed I began making the Tanning solution. Amy lists 2 was of doing it but I just stuck with what she does. For every gal of water used use 1oz of EZ-Tan and 8oz of salt. Amy says 3 level tbsp = 1 oz but everywhere I checked said that 2 tbsp = 1oz so, since I used 3 gal of water I put in 6 tbsp of EZ-Tan. 2tbsp=1oz, 3oz needed, 3x2=6tbsp. For the salt I just the scale I weigh the rabbits with. I don't know if she had a typo or what but that's what I did.
Moving on when I was making the tanning solution I started out with a whole new batch of water. I dumped the old pickle out and put fresh water + other ingredients in. You need to check the PH of the tanning solution before you put the pelts in. I did and it came out as PH 6. Learn from my mistake and keep at least a cup of the pickle solution. I didn't have any so in went a few drops of acid which took it to a 5 and with a few more drops was down to a 4. PH 4 is where it needs to be. Amy says to dissolve the EZ-tan in some warm water first. I tried that but I think next time I'll just make the 3 gal water luke warm which will help the EZ-tan dissolve. The pelts are supposed to stay in the tanning solution for 16-24 hours at room temperature. Most small game pelts are tanned by 16 hours according to Amy who also says not to leave them in the tanning solution too long or they will turn out rubbery.
PART 4
Ok, so after the tanning solution to you take the hides and put the some oil tanning oil on them. I don't know if this is a necessary step or not but I have tanning oil so I put it on there. You let them dry a bit and then mix the oil with some warm water and apply with a paint brush or with your hands. I used my hands and just messaged the oil in. I don't know when the pelts are dry enough to put the oil on but Amy says she waits 30 min or so. That's what I did.
After that you fold the pelts up "skin to skin and fur to fur" and put them in a warm spot for 4 to 6 hours to let them "sweat". Mine stayed close to the fire place for about 6 hours so I'm guessing that was warm enough for long enough.
The next step I'm still doing and still mighty confused on. You are supposed to let the pelts dry to the point where they aren't dripping wet but they aren't rock hard either. The best way I found was to try and stretch them a bit. If it turns white keep stretching that part. If it doesn't turn white, let it dry a little longer. If it turns white then goes back to the original color stretch for a bit, wait until it drys a little more, then stretch a little more. I believe the color also has to do with how well they were fleshed. Looking back on mine, I don't believe I fleshed them well enough so they never really turned a nice white. They stayed an off white even after being nice and soft. I pulled them over tables and chairs on the fur side and flesh side. I find it easier to monitor how things are going if you pull it over the chair fur side down. I took my time, applying pressure upwards with one hand while pulling downwards with the other hand.
PART 5
Learn from my mistake. If you break the skins over a chair try not to do it over the corner of the chair. When the pelt is completely broken you will have bulges from the corner. Just take your time. This process can take a couple of days to complete. That doesn't mean that you are tugging on a rabbit hide for a couple of days, it just means that you take a few minutes per hide sometime during the day until they don't need to be stretched anymore. After they were completely dry and stretched I took a pumice stone, (like the one you use on feet to soften them up.....yes, my wife made me use it on her feet first.. ) and lightly rub them down just like you would feet. This will make them even softer.
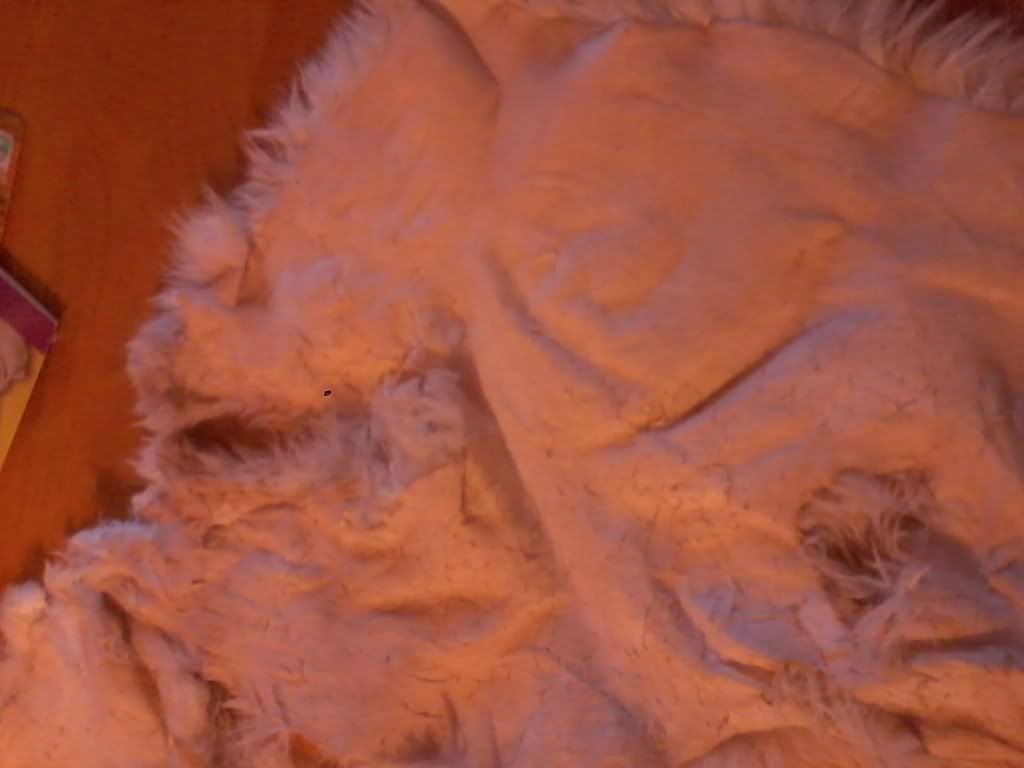
After all the work, this is what mine look like.
This is what my best one looks like.
And this is what my worst one looks like.
That has become my test hide to see how it does in the wash and on air dry in the drier.
CONCLUSION
Ok, so thanks for reading and joining me on this. As I've said, this is my first time and there are things that I will do differently next time. I will list them below.
1.) MAKE SURE YOU HAVE ALL THE TOOLS AND ITEMS YOU NEED BEFORE YOU START.
2.) WHEN YOU FLESH TRY TO GET AS MUCH FLESH AS POSSIBLE OFF.
3.) WHEN DOING THIS METHOD JUST ADD BAKING SODA TO THE PICKLE TO MAKE THE NEUTRALIZER.
4.) I WILL ONLY BE DOING 3 RABBIT HIDES AT A TIME NOW.
5.) I WON'T BE USING A BUTTER KNIFE TO FLESH. I WILL BE USING A MEDIUM PUTTY KNIFE WITH ROUNDED CORNERS.
I'll be doing a second round of pelts here soon so we'll see how things go with those.
So I finally pushed myself into tanning the rabbit hides so I could make something with all the rabbit fur laying around in the freezers. I figured since this is my first time I would do a step by step not only for the people who don't know what to do or to show people what NOT to do but also so that if I did end up miraculously doing this right....that I would know what I did so I could do it again. :?
So first things first. I am going to give due credit where it is deserved. I'm not making this process up myself but I am taking it from http://www.taxidermy.net/forum/index.php/topic,56668.0.html. This is the absolute best one I could find and gives a wonderful breakdown that even someone of my limited intelligence can understand...for the most part. The only thing it doesn't include are pictures and mistakes. That's where I come in at. Now when it comes to the tanning process I decided to go with the EZ tan solution. It was reasonably priced and it is easy to use. Plus it's what she used so if I was going to use her instructions to the tee I might as well use the solution as well.
I began with 4 hides. Three were frozen and 1 was being salt preserved. I let the one that was being salt preserved sit in a 5 gal bucket of a water/salt solution which consisted of 1 gal water with 2 lb of salt for about 6 hours. While that was sitting in the bucket I sat out the other 3 hides that were in the freezer to let them thaw.
After the thawing and relaxing (process by which the salted pelt is returned to a semi-flexible state) was done I put all 4 pelts in a tote filled with 3 gal of water. Below is the pic of the pelts in the tote. The yellow looking thing you see in there is the salt preserved pelt. The EZ tan system says to use 1/2 oz of the acid for every 1 gal of water. So in went 3 tbsp of the acid. (One tbsp = 1/2 oz. 1/2oz x 3 gal = 3tbsp.) Along with that went in 3lbs of salt which I had to ended up running to Meijer to get because TSC doesn't carry anything it's supposed to.
The PH level of the water is supposed to be around 1 but not above 2.5 or 3 as that will allow the bacteria to grow. (Again, this is taken from the previously mentioned website.) My PH testing strips start at 6 and go to 9 so...learn from my mistake and check to make sure your tester has a low enough reading. Tomorrow I will go find some that actually read what I need and pray that my solution is correct. In the mean time I stir the pelts around occasionally just to make sure the acid is able to penetrate everywhere and nothing is hiding.
PART 2
Ok, so the hides have soaked for 48 hours. Now it's time for the work to begin, unless you have a fleshing machine. In which case, I don't like you. :angry: If you don't have a fleshing machine or a fleshing knife, (basically just a knife with a handle on both ends,) then just use a dull knife. I had a metal butter knife and another dull knife with me. WHERE GLOVES! It's acid! You're hands will thank you later.
Since rabbit hides are so thin there really isn't much fleshing to do, compared with a deer. However, if you had a fat rabbit that you are now trying to flesh, you will cuss that rabbit. In the fleshing process you want to get as much of the fat and muscle off the skin as possible. The more you get off the better and softer the pelt will turn out. That said you don't want to go too deep, because with the pelts being thin you are likely to go through the pelt, which really sucks. The process I used to flesh them was just to scrap as much of the flesh as possible up, then peel, little by little so as to take large scraps at a time. Slow and steady wins the race. Patience is your friend here, call her. Remember, don't go too deep. The fryer pelts, (12 weeks for me) will be a bit tricky especially where the belly was but don't worry too much. Get the fat and muscle.
As noted before I had 2 different types of pelts, one that was salted and others that were frozen. The salted pelt came from a 1 1/2 year old doe. Once does get so old their hides begins to thicken up. Don't ask me when this is because I don't know. I do know it's after 12 weeks.
This is the picture of what the salted pelt looks like after it has sat in a pickle for 48 hours.
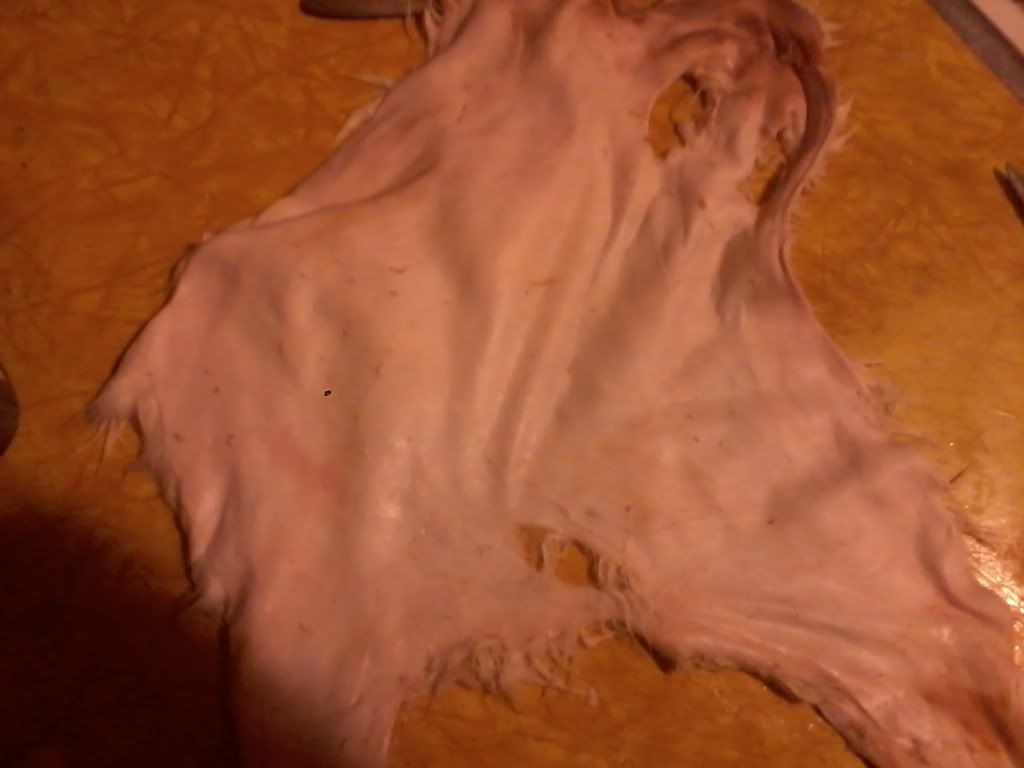
This is what the salted pelt looks like when half of it has been fleshed.
Next is a frozen pelt that has been sitting in pickle for 48 hours. Probably can't tell too well from the picture but the skin is whiter than what it was before you put it in the pickle, and more plump.
This is what the frozen pelt looks like after it has been fleshed. Remember what I said about 12 week old skins being thin? Look at the bottom of the picture to see a nice hole I put in it. Learn from my mistakes as I said earlier and be very careful with these pelts. No too much needs to come off. Just the fat and the muscle. You go too low and you get this.
After you are done fleshing the pelts put them back in the pickle solution for another 24 hours. Make sure you check the PH level again and do a bit of stirring when you walk pass or get a free moment. This allows the pickle to penetrate to the areas that are now freshly exposed and kill the bacteria too. You don't kill the bacteria and you have slippage (fur coming out in clumps).
PART 3
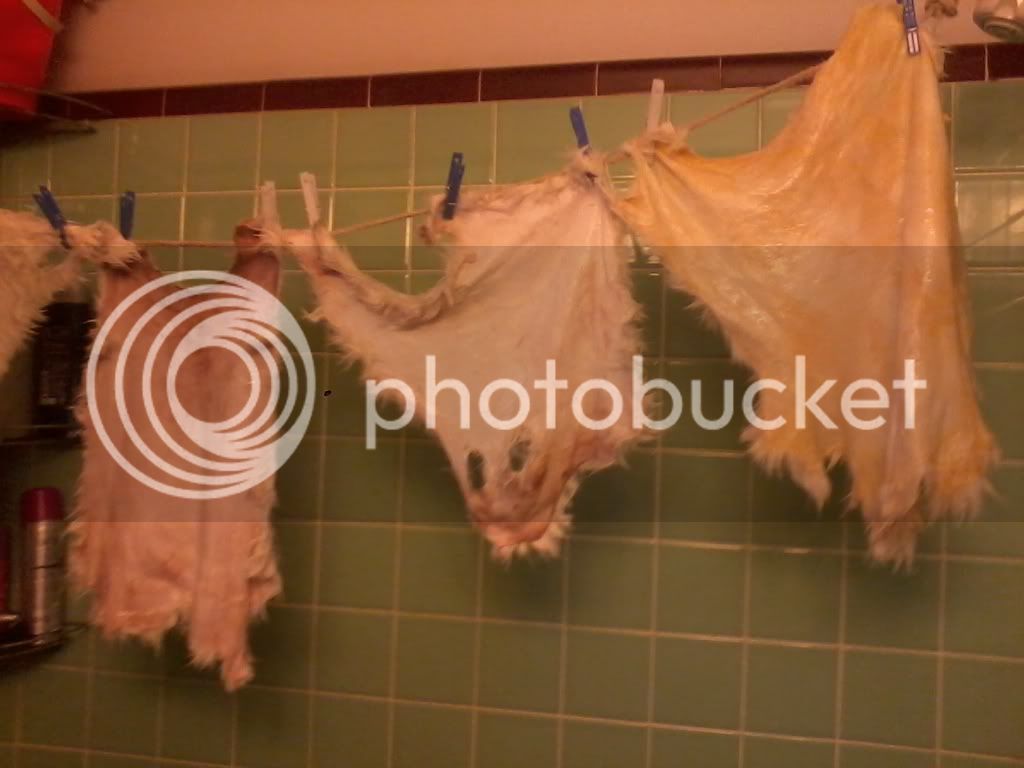
After I kept the pelts in the pickle for another 24hours ish, (it was actually a bit longer because I didn't want to do this at 12am,) you take them out and let them drain. When I took mine out I made sure to SQUEEZE out the pickle back into the tote it came out of. Notice I said SQUEEZE not ring. As I've said, rabbit pelts are thin, if you ring you take the chance of ripping them. That isn't a chance I'd want to take after all this waiting and work. I hung them above the bathtub so that when they drained the left over pickle would just fall into the bathtub.
This is what they look like after their second pickle soaking, squeezing and being hung. Mine still looked like they had places that started to swell from being in the pickle again but I just left those areas alone since I didn't want to open up anymore spots that the pickle might not have been yet.
While they were hanging up I went and tried to prepare the neutralizing solution. I didn't really understand the directions from Amy though so this was a bit of a challenge. In the directions she said to add 1 tablespoon of baking soda to every gal of water "needed to submerge the skins". I thought she was saying to make completely different batch and just put baking soda in it. That didn't really make since to me but I didn't want to ruin the pickle mixture if I needed more so I mixed 3 gal water w/ 3 tbsp baking soda and it came out to a PH of 11. Yep, that's definitely not what she meant. So I took a few tbsp of the pickle and put it in my new solution. Went to a PH of 10. I don't like wasting money and this wasn't going anywhere since the solution is supposed to be at a PH of 4. I took the pickle and added 3 tbsp of baking soda and got a PH of 8. So since we didn't have anymore pickle, as that is what we were using, I added some acid, which made it go down to PH 1. Sigh..OK, add baking soda for get 6, little acid, 5, little acid, 5 little acid 4! BINGO! It took longer than that. We used 18 PH strips to test it. Learn from my mistake. Use the pickle solution and just add a little bit of baking soda to it, testing each time. That should save a bunch of time.
The pelts stay in the solution for "NO MORE" than 20 min and I occasionally stirred. For the reason refer to Amy. She writes it better than I could.
When the time was about up I starting taking pelts out and rinsing them off well. I just stuck them in the sink and sprayed them off with cold water until I was satisfied.
After they were rinsed I began making the Tanning solution. Amy lists 2 was of doing it but I just stuck with what she does. For every gal of water used use 1oz of EZ-Tan and 8oz of salt. Amy says 3 level tbsp = 1 oz but everywhere I checked said that 2 tbsp = 1oz so, since I used 3 gal of water I put in 6 tbsp of EZ-Tan. 2tbsp=1oz, 3oz needed, 3x2=6tbsp. For the salt I just the scale I weigh the rabbits with. I don't know if she had a typo or what but that's what I did.
Moving on when I was making the tanning solution I started out with a whole new batch of water. I dumped the old pickle out and put fresh water + other ingredients in. You need to check the PH of the tanning solution before you put the pelts in. I did and it came out as PH 6. Learn from my mistake and keep at least a cup of the pickle solution. I didn't have any so in went a few drops of acid which took it to a 5 and with a few more drops was down to a 4. PH 4 is where it needs to be. Amy says to dissolve the EZ-tan in some warm water first. I tried that but I think next time I'll just make the 3 gal water luke warm which will help the EZ-tan dissolve. The pelts are supposed to stay in the tanning solution for 16-24 hours at room temperature. Most small game pelts are tanned by 16 hours according to Amy who also says not to leave them in the tanning solution too long or they will turn out rubbery.
PART 4
Ok, so after the tanning solution to you take the hides and put the some oil tanning oil on them. I don't know if this is a necessary step or not but I have tanning oil so I put it on there. You let them dry a bit and then mix the oil with some warm water and apply with a paint brush or with your hands. I used my hands and just messaged the oil in. I don't know when the pelts are dry enough to put the oil on but Amy says she waits 30 min or so. That's what I did.
After that you fold the pelts up "skin to skin and fur to fur" and put them in a warm spot for 4 to 6 hours to let them "sweat". Mine stayed close to the fire place for about 6 hours so I'm guessing that was warm enough for long enough.
The next step I'm still doing and still mighty confused on. You are supposed to let the pelts dry to the point where they aren't dripping wet but they aren't rock hard either. The best way I found was to try and stretch them a bit. If it turns white keep stretching that part. If it doesn't turn white, let it dry a little longer. If it turns white then goes back to the original color stretch for a bit, wait until it drys a little more, then stretch a little more. I believe the color also has to do with how well they were fleshed. Looking back on mine, I don't believe I fleshed them well enough so they never really turned a nice white. They stayed an off white even after being nice and soft. I pulled them over tables and chairs on the fur side and flesh side. I find it easier to monitor how things are going if you pull it over the chair fur side down. I took my time, applying pressure upwards with one hand while pulling downwards with the other hand.
PART 5
Learn from my mistake. If you break the skins over a chair try not to do it over the corner of the chair. When the pelt is completely broken you will have bulges from the corner. Just take your time. This process can take a couple of days to complete. That doesn't mean that you are tugging on a rabbit hide for a couple of days, it just means that you take a few minutes per hide sometime during the day until they don't need to be stretched anymore. After they were completely dry and stretched I took a pumice stone, (like the one you use on feet to soften them up.....yes, my wife made me use it on her feet first..
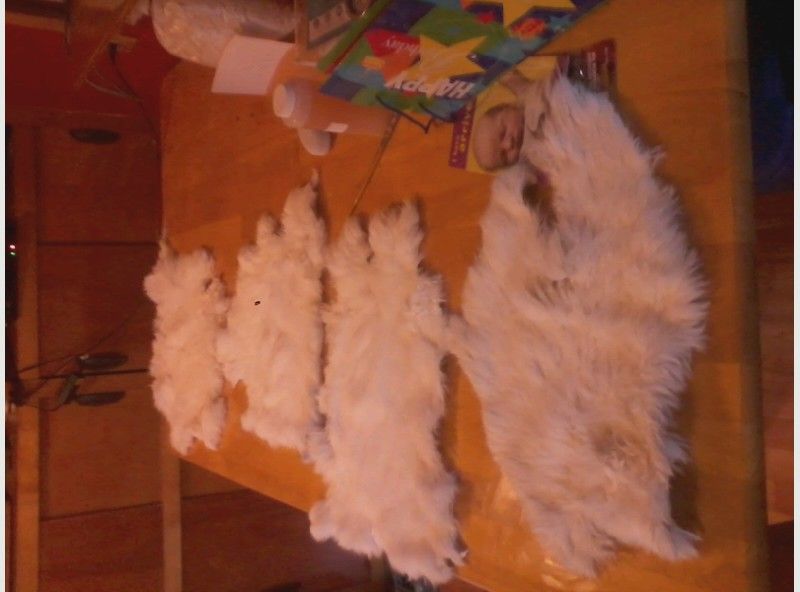
) and lightly rub them down just like you would feet. This will make them even softer.After all the work, this is what mine look like.
This is what my best one looks like.
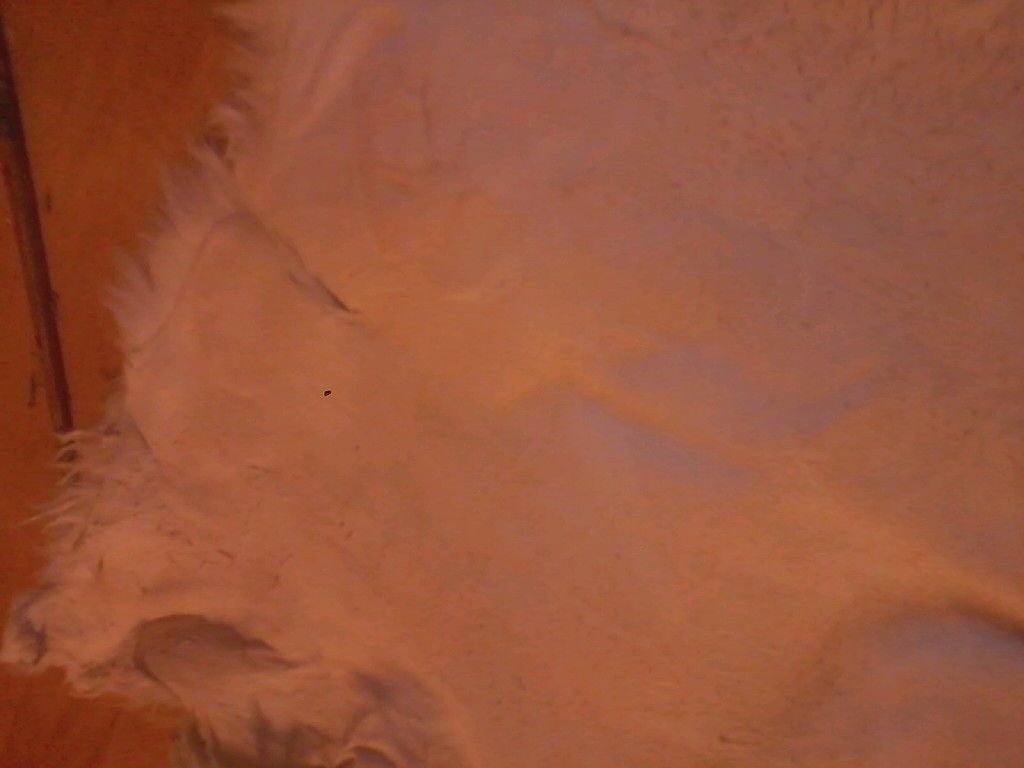
And this is what my worst one looks like.
That has become my test hide to see how it does in the wash and on air dry in the drier.
CONCLUSION
Ok, so thanks for reading and joining me on this. As I've said, this is my first time and there are things that I will do differently next time. I will list them below.
1.) MAKE SURE YOU HAVE ALL THE TOOLS AND ITEMS YOU NEED BEFORE YOU START.
2.) WHEN YOU FLESH TRY TO GET AS MUCH FLESH AS POSSIBLE OFF.
3.) WHEN DOING THIS METHOD JUST ADD BAKING SODA TO THE PICKLE TO MAKE THE NEUTRALIZER.
4.) I WILL ONLY BE DOING 3 RABBIT HIDES AT A TIME NOW.
5.) I WON'T BE USING A BUTTER KNIFE TO FLESH. I WILL BE USING A MEDIUM PUTTY KNIFE WITH ROUNDED CORNERS.
I'll be doing a second round of pelts here soon so we'll see how things go with those.