


grumpy
Well-known member
Also called---------FLAT-NOSED FEEDERS :x :x
""and a whole lot of other names"" while I made them. :x :x
I've espoused "Fine-X Feeders" all along. But, I've ran across
circumstances where the Fine-X just don't do the job properly.
"Scratchers" can destroy the bottom wire and waste a lot of feed.
I have several "Flat-Nosed" feeders that I will occasionally use to deter
a rabbit bent on self-destruction or "suicide" if you will. Scratcher's and
Digger's don't last very long in this rabbitry.
My skills........and patience were stretched to the limit with this little project.
I don't believe I'll attempt making anymore of these. Although a little pricey
out of Bass Rabbitry.......I've concluded they're worth every cent they get.
Bass carries two sizes...I opted to duplicate the larger of the two. Using wood
in lieu of the sheet metal. What a nightmare....messing with all those tiny
pieces of wood. Every piece MUST be exactly like the one before,
and exactly like the one that follows.
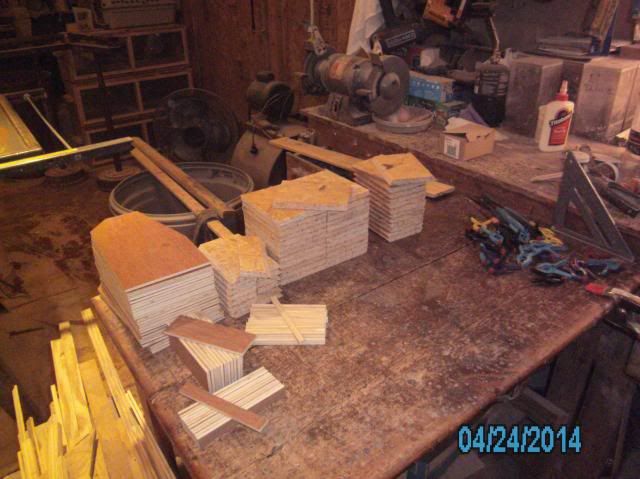
Here's all of the pieces cut to specs and stacked, sans the wire backing.
Those little jewels were a real pain. More about them later... :angry:
BTW: I'm gonna need every one of them little clamps here in just a second.
Some of these pieces were so small, I couldn't use any kind of metal fastener.
Consequently, I laid in a healthy supply of yellow-glue before I started.
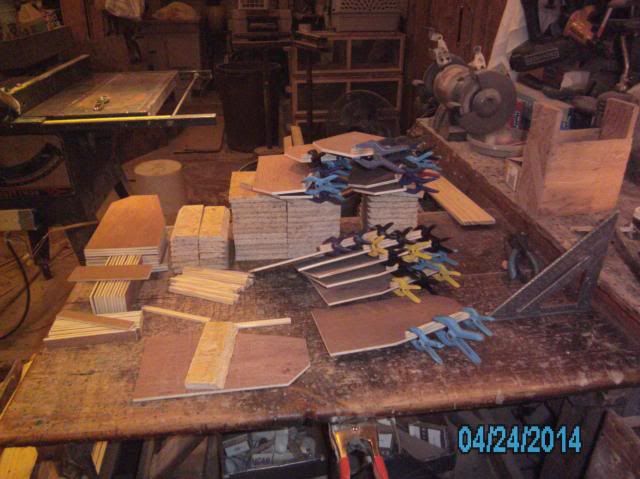
Pretty little buggers aren't they! I bought two containers of those small
clamps, and I can find a hundred uses for them in and around the rabbitry.
Plus, the wood shop. This pic shows the 16 wood-pieces it takes to make one feeder.
Plus, you gotta remember: There's a left-hand and a right-hand side to each one.
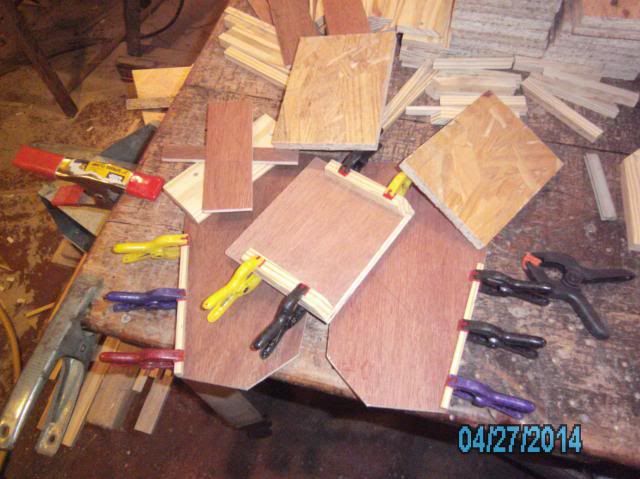
Things are starting to come together. Sorry for not taking more pics, but I
was well to the limit of my "frustration" by this time. Several of the pre-cuts
weren't exact, or the wrong material, and had to be re-made.
The wire inserts were horrendous! Each had to be cut 1/16th inch undersize
on the width to work properly. I curled the end just like you would a piece of
paper pulling it over the edge of the table. You have to build these from the
inside-out. Otherwise, you can't anchor the wire properly.
(Ask me how I know this little tid-bit of information!) :evil: :evil:
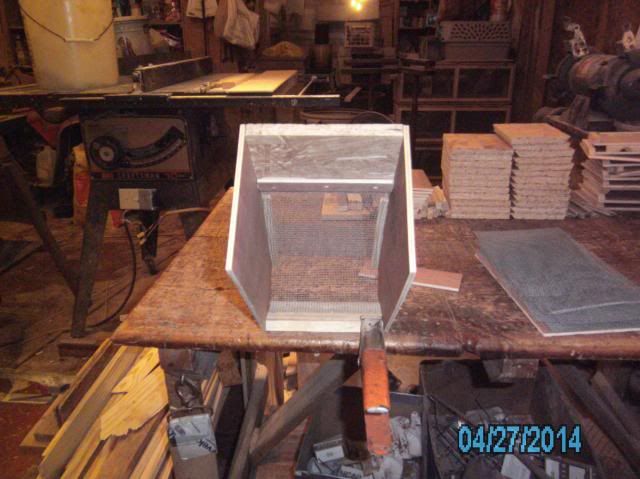
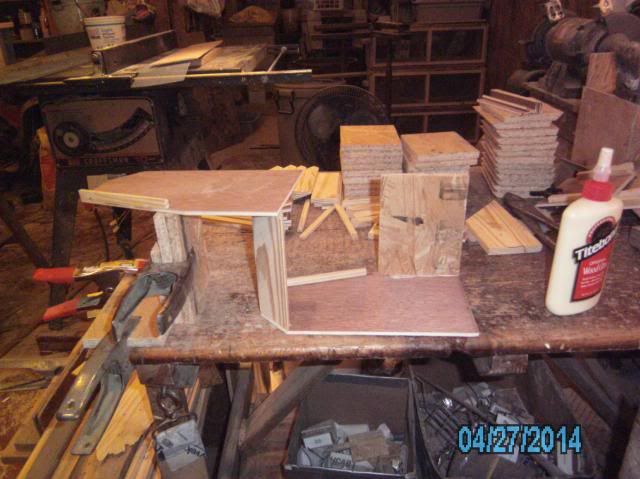
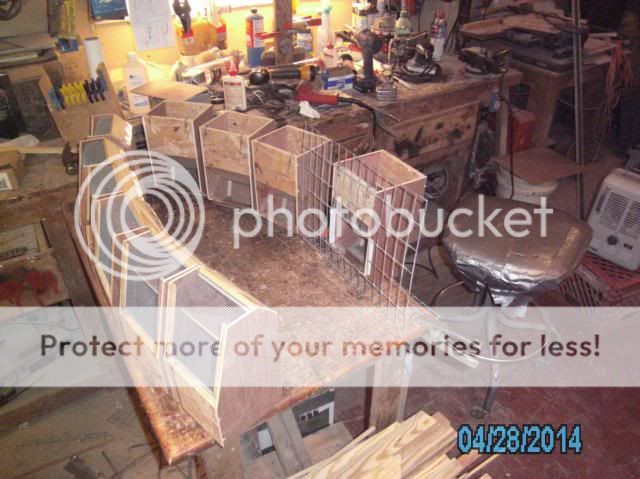
It's nearly complete...yea!! Here's a pic showing the angle board and the
face of the feeder installed.
The unit lying "face-down" on the bench. I was like that a time or two. LOL.
A "mounted" view using junk wire.
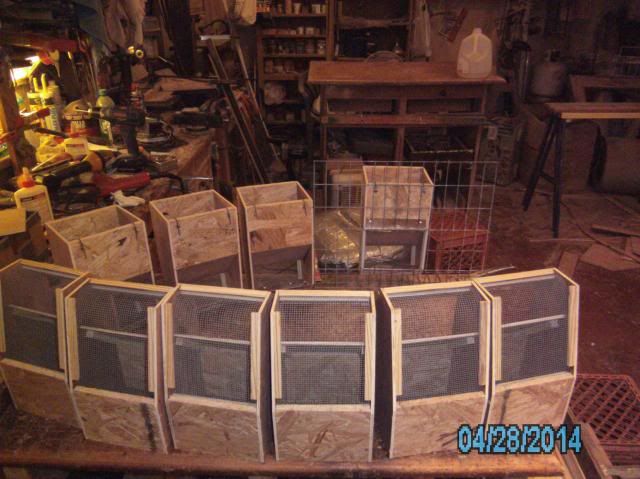
All the little "piggy's" all in a row. I chose to make a dozen.
Why????? I have absolutely no clue. But, the extra pair is up on the saw
and out of camera shot.
Final Note: I wouldn't recommend trying this. I was pushed to the limit
in patience and "nerves".... The ""edges"" touching the cage must be
protected. Otherwise the inmates will make mincemeat of them in a few days.
The one hanging on the junk wire has those safe-guards already installed.
 I beleeb dis is da worstest project I ebber twied.
Hope you enjoyed the pics.
grumpy.
""and a whole lot of other names"" while I made them. :x :x
I've espoused "Fine-X Feeders" all along. But, I've ran across
circumstances where the Fine-X just don't do the job properly.
"Scratchers" can destroy the bottom wire and waste a lot of feed.
I have several "Flat-Nosed" feeders that I will occasionally use to deter
a rabbit bent on self-destruction or "suicide" if you will. Scratcher's and
Digger's don't last very long in this rabbitry.
My skills........and patience were stretched to the limit with this little project.
I don't believe I'll attempt making anymore of these. Although a little pricey
out of Bass Rabbitry.......I've concluded they're worth every cent they get.
Bass carries two sizes...I opted to duplicate the larger of the two. Using wood
in lieu of the sheet metal. What a nightmare....messing with all those tiny
pieces of wood. Every piece MUST be exactly like the one before,
and exactly like the one that follows.
Here's all of the pieces cut to specs and stacked, sans the wire backing.
Those little jewels were a real pain. More about them later... :angry:
BTW: I'm gonna need every one of them little clamps here in just a second.
Some of these pieces were so small, I couldn't use any kind of metal fastener.
Consequently, I laid in a healthy supply of yellow-glue before I started.
Pretty little buggers aren't they! I bought two containers of those small
clamps, and I can find a hundred uses for them in and around the rabbitry.
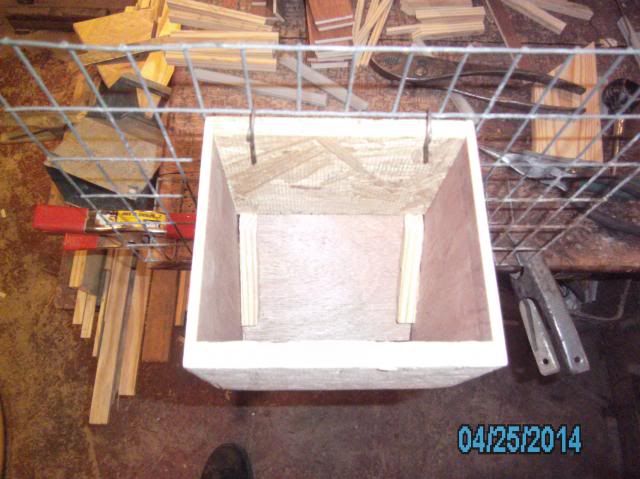
Plus, the wood shop. This pic shows the 16 wood-pieces it takes to make one feeder.
Plus, you gotta remember: There's a left-hand and a right-hand side to each one.
Things are starting to come together. Sorry for not taking more pics, but I
was well to the limit of my "frustration" by this time. Several of the pre-cuts
weren't exact, or the wrong material, and had to be re-made.
The wire inserts were horrendous! Each had to be cut 1/16th inch undersize
on the width to work properly. I curled the end just like you would a piece of
paper pulling it over the edge of the table. You have to build these from the
inside-out. Otherwise, you can't anchor the wire properly.
(Ask me how I know this little tid-bit of information!) :evil: :evil:
It's nearly complete...yea!! Here's a pic showing the angle board and the
face of the feeder installed.
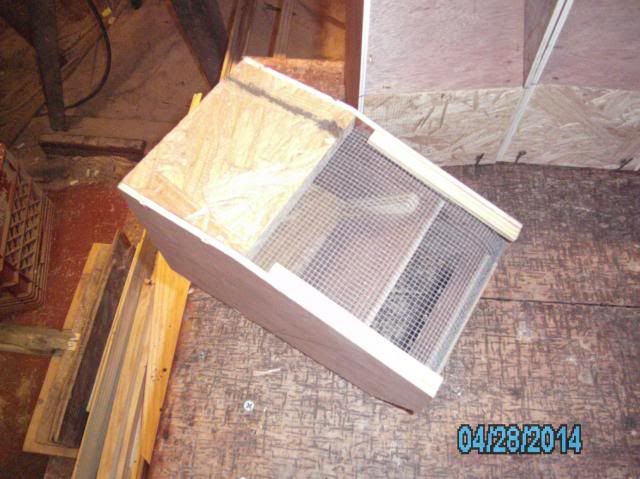
The unit lying "face-down" on the bench. I was like that a time or two. LOL.
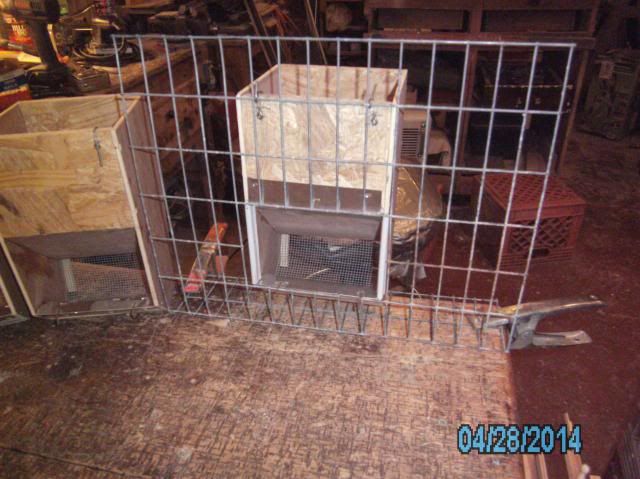
A "mounted" view using junk wire.
All the little "piggy's" all in a row. I chose to make a dozen.
Why????? I have absolutely no clue. But, the extra pair is up on the saw
and out of camera shot.
Final Note: I wouldn't recommend trying this. I was pushed to the limit
in patience and "nerves".... The ""edges"" touching the cage must be
protected. Otherwise the inmates will make mincemeat of them in a few days.
The one hanging on the junk wire has those safe-guards already installed.
I beleeb dis is da worstest project I ebber twied. Hope you enjoyed the pics.
grumpy.